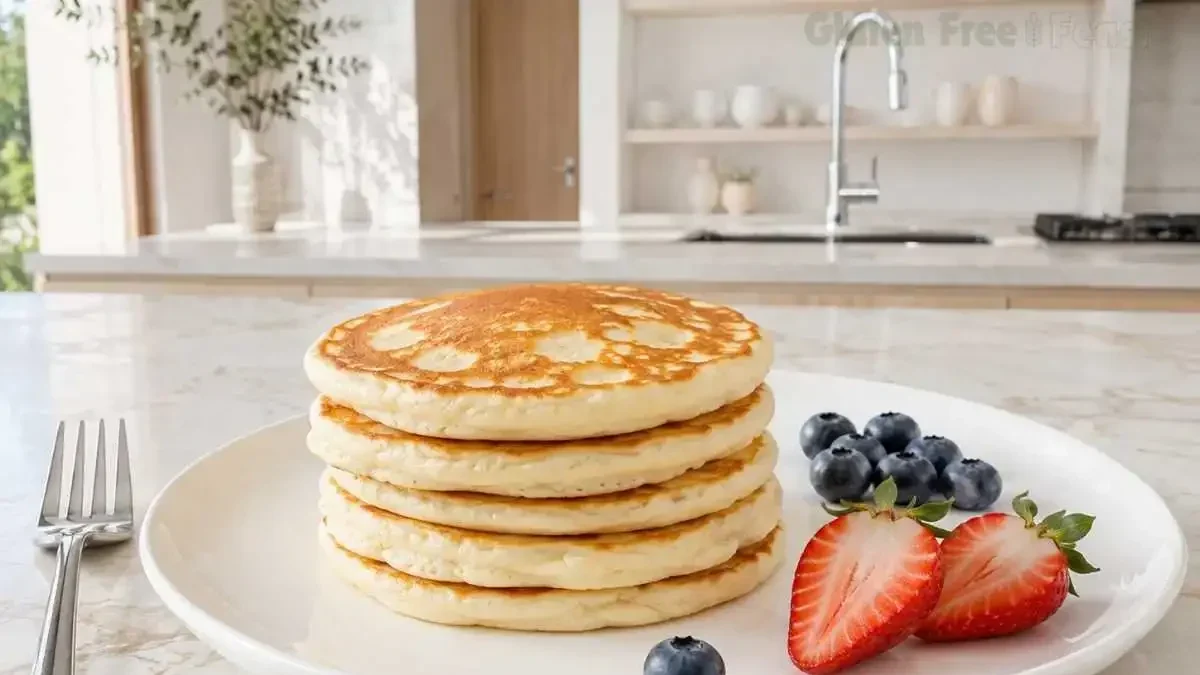
These gluten free pancakes come out golden at the edges, cloud-light in the center, and stack beautifully every time. After six test batches in my dedicated gluten-free kitchen, I found that the difference between a flat, gummy result and a genuinely fluffy stack came down to two things: the right certified GF flour blend and a five-minute batter rest before cooking. That short pause is what most recipes skip, and it is the single biggest reason mine work.
If you have celiac disease or cook for someone who does, you can make this recipe with full confidence. Every ingredient is certified gluten-free, and I will walk you through exactly which cross-contamination steps actually matter. You will have a perfect plate of gluten free pancakes on the table in 20 minutes.
Key takeaways
Fluffy gluten-free pancakes come down to four things. Use a certified gluten-free 1:1 flour blend that contains xanthan gum — single GF flours like rice flour or almond flour alone will not hold the structure. Use certified GF baking powder specifically: standard baking powder from some brands contains wheat starch and is the most commonly missed source of cross-contamination. Rest the batter for exactly 5 minutes before cooking so the gluten-free starches fully hydrate — this is the step most recipes skip. Cook on medium heat and flip only once.
Ready in: 20 minutes · Serves: 8 pancakes · Best flour: Bob’s Red Mill 1:1 or King Arthur Measure for Measure
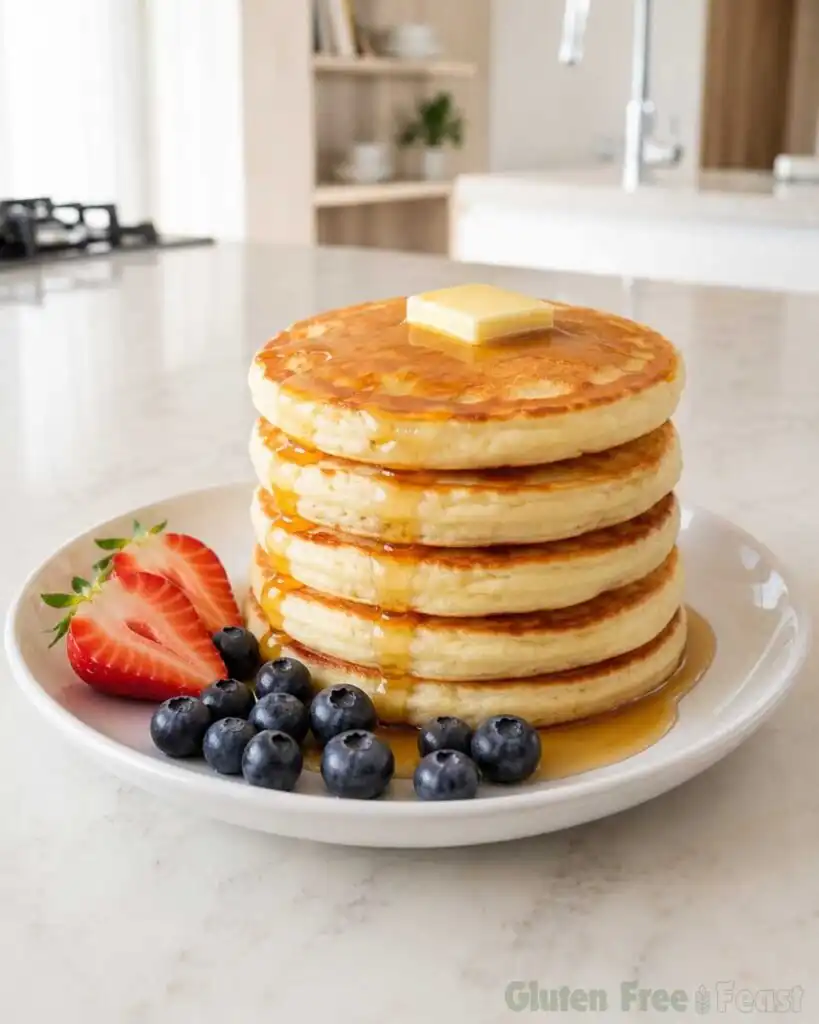
Table of Contents
Why You Will Love This Gluten Free Pancake Recipe
- Genuinely fluffy. Not the dense, gummy texture that ruins most gluten free pancakes
- 20 minutes from start to table with one bowl and minimal cleanup
- 100% celiac-safe when made with certified gluten-free ingredients throughout
- Dairy-free and vegan adaptations included with zero compromise on texture
- Freezer-friendly. Make a double batch and store for quick weekday breakfasts
- No unusual ingredients. Built from pantry staples and one good GF flour blend
- Science-backed resting step that produces a measurably fluffier result every single batch
Gluten Free Pancakes
Ingredients
Equipment
Method
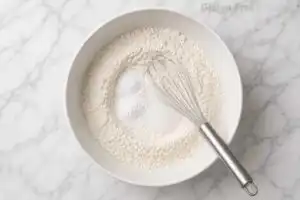
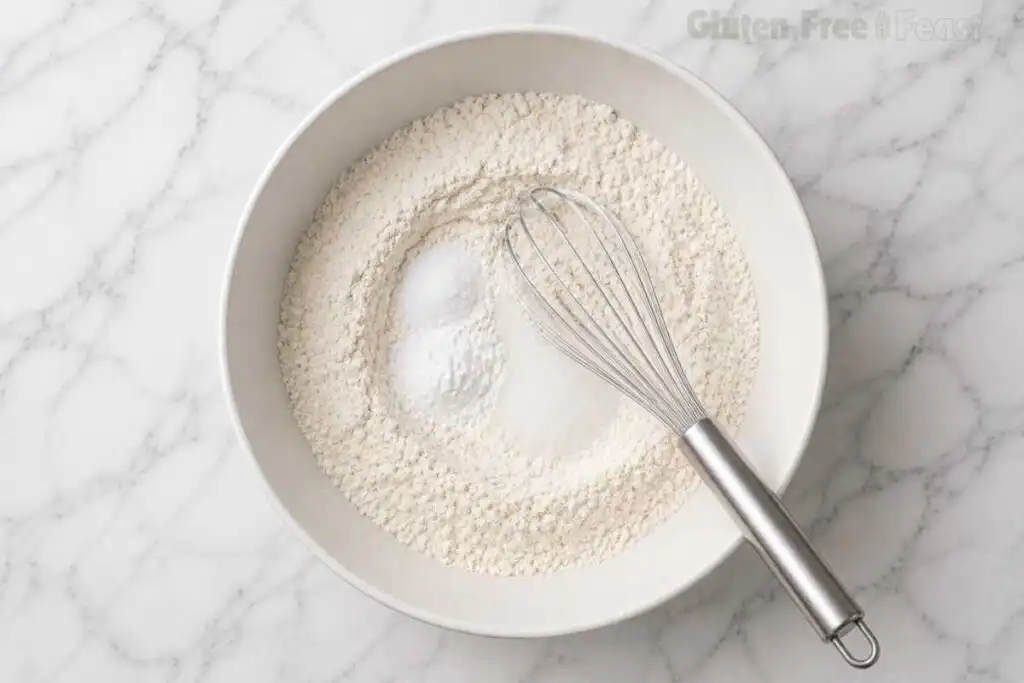
- Whisk together the flour blend, certified GF baking powder, xanthan gum (if using), sugar, and salt in a large bowl until evenly combined. Whisk for 30 seconds to distribute the baking powder evenly through the flour. Uneven distribution causes inconsistent rise across the batch.
- In a separate jug, whisk the milk, egg, melted butter, and vanilla extract until the egg is fully incorporated. Make sure the butter is warm but not hot when it goes in. Hot butter will begin to cook the egg on contact, creating streaks in the final batter.
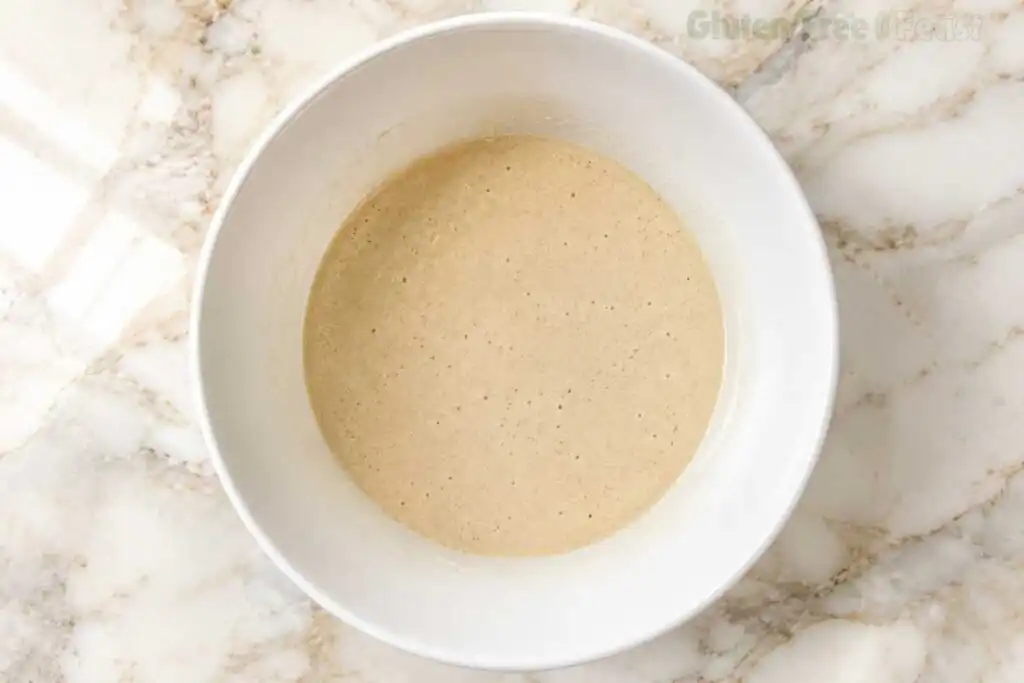
- Pour the wet ingredients into the dry. Stir gently with a fork or silicone spatula until just combined. Stop as soon as you no longer see dry flour. Small lumps are completely normal and will cook out. Do not overmix.
- Rest the batter for exactly 5 minutes without stirring. When gluten-free starch granules absorb liquid over time, they swell uniformly and form a smoother batter that traps CO2 bubbles more efficiently during cooking. The result is a pancake that rises higher and holds its structure better. Do not skip this step.

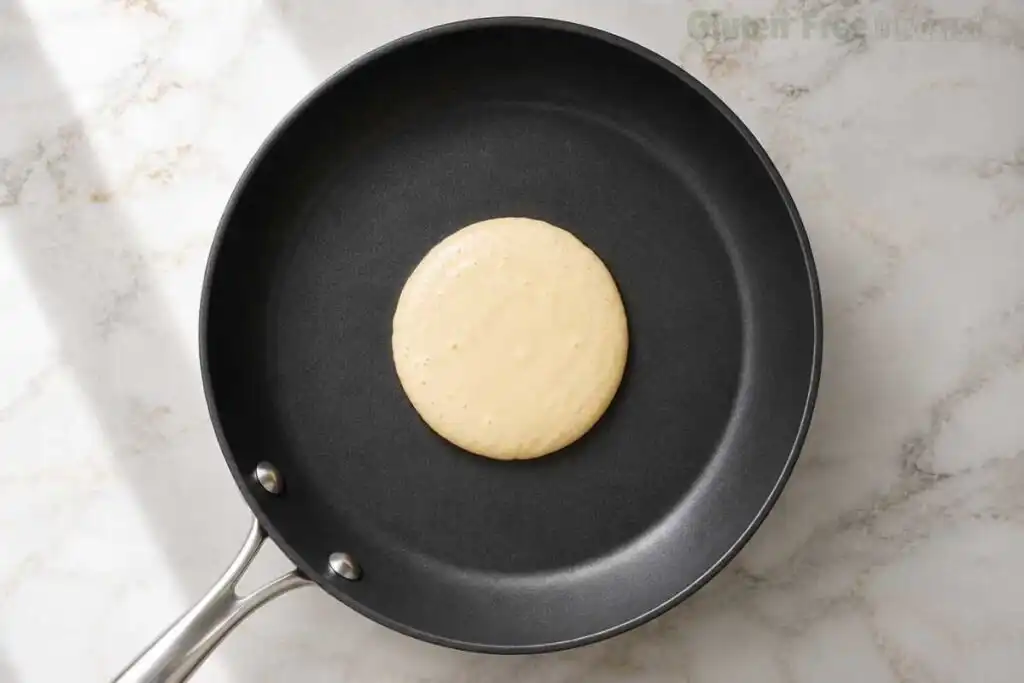
- Heat a nonstick skillet or griddle over medium heat. Brush lightly with butter or oil. The pan is ready when a drop of water flicked onto the surface bounces and evaporates immediately. Pour 1/4 cup of batter per pancake. Do not spread or press the batter down. Let it settle naturally.

- Cook until bubbles form across the entire surface of the pancake and the edges look set and no longer shiny, about 2 to 3 minutes. Flip once. Press lightly with a spatula and cook for a further 1 to 2 minutes until golden brown on the underside. A properly cooked pancake will spring back slightly when pressed in the center.
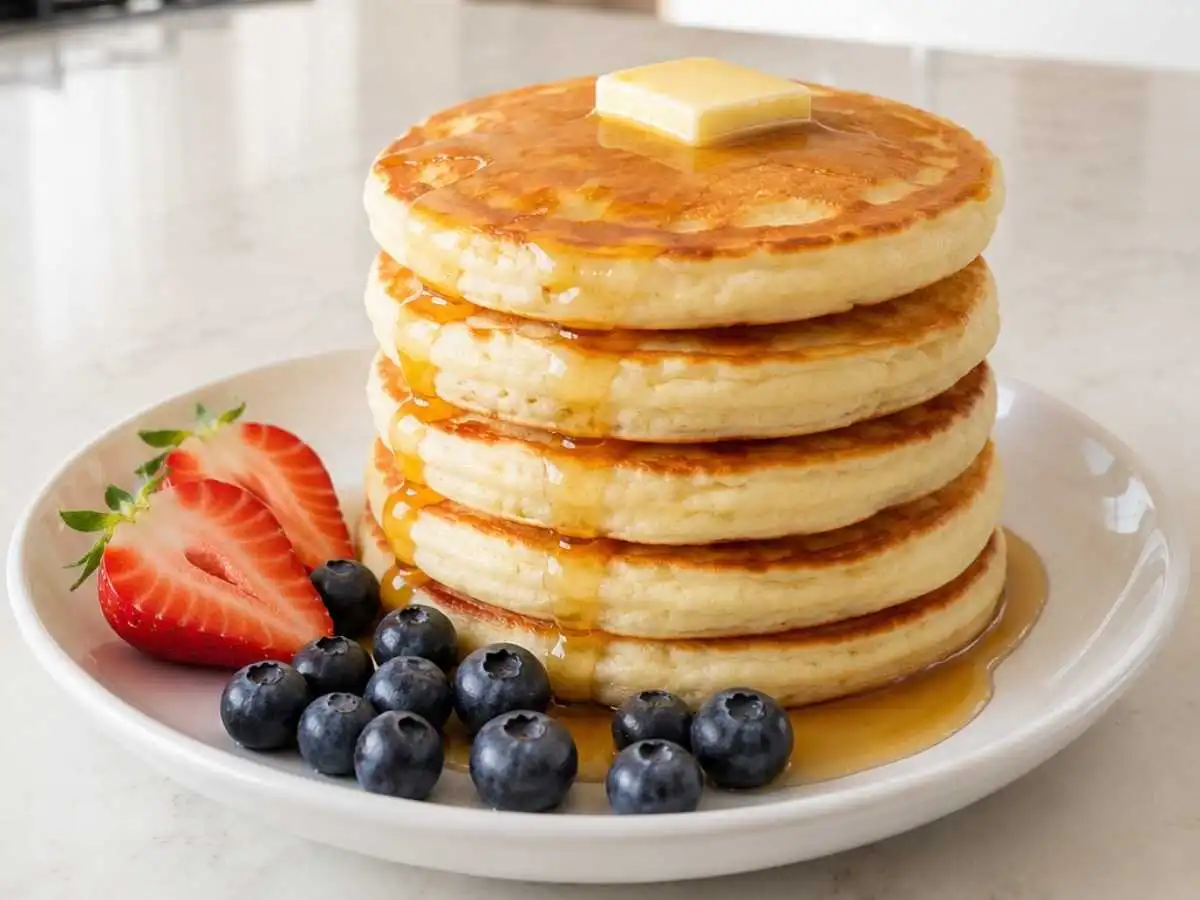
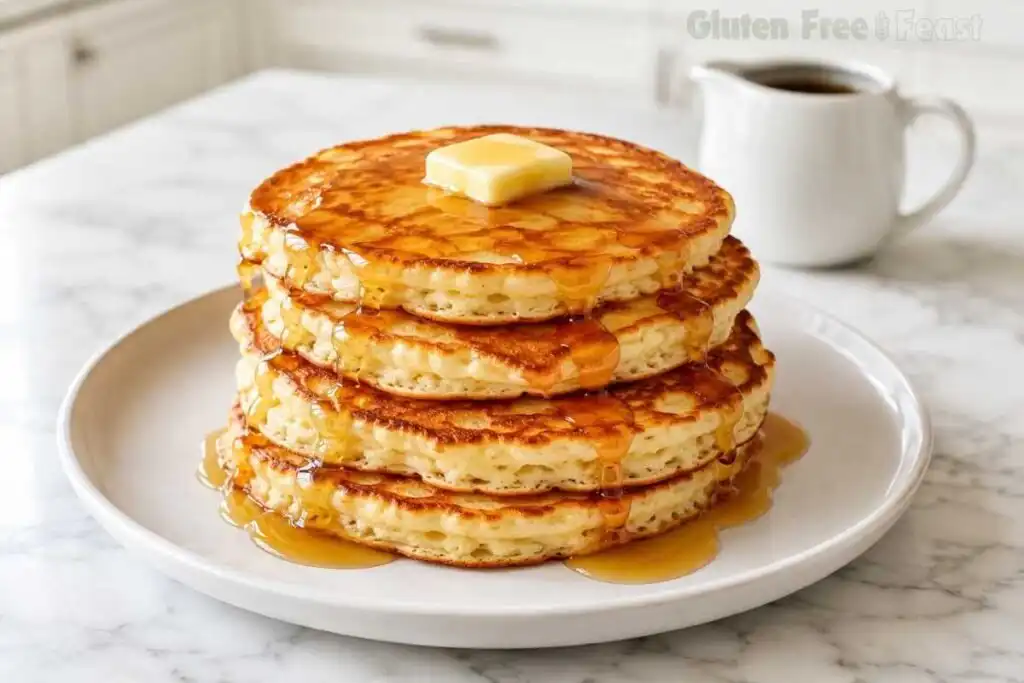
- Transfer finished pancakes to a plate, or keep them warm on a baking sheet in a 200°F oven while you cook the remaining batter. Serve with pure maple syrup, fresh berries, or your topping of choice.

Notes
Ingredients for Gluten Free Pancakes
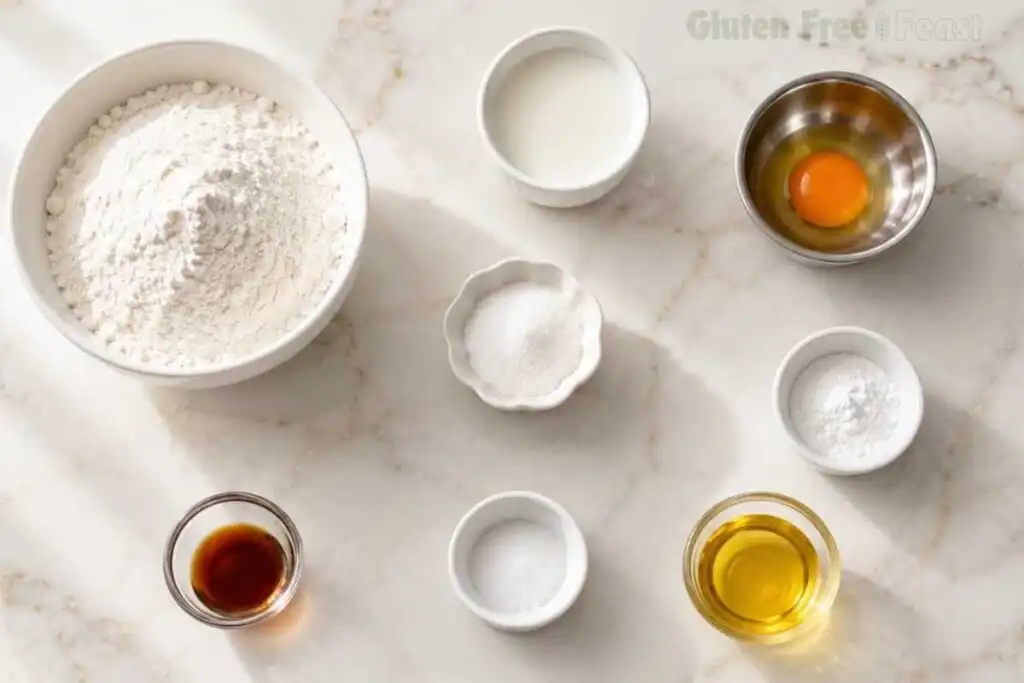
Ingredient Notes and Substitutions
Certified GF 1:1 flour blend. This is the most important ingredient. I use Bob’s Red Mill Gluten Free 1:1 Baking Flour because it contains xanthan gum and produces a consistent result batch after batch. King Arthur Measure for Measure is an equally reliable alternative. Do not substitute a single GF flour such as almond flour or rice flour alone. The blend is essential for structure.
Certified GF baking powder. This is the ingredient most GF pancake recipes get wrong. Standard baking powder from some brands contains wheat starch as an anti-caking filler. Always check that your baking powder carries a certified GF label. Bob’s Red Mill and Rumford are both certified GF options available in most grocery stores.
Xanthan gum. If your flour blend does not already contain xanthan gum, add 1/4 teaspoon here. In the absence of gluten, xanthan gum replicates the elastic network that gluten proteins normally form. It gives the batter enough structure to hold together when flipped and prevents the pancake from crumbling at the edges.
Butter over oil. I use melted unsalted butter rather than vegetable oil. The water content in butter creates a slightly more tender crumb and richer flavor. You can substitute an equal amount of neutral oil with no effect on the final texture.
Dairy-free substitution: Replace whole milk with oat milk, almond milk, or coconut milk in a 1:1 ratio. Replace butter with an equal amount of melted coconut oil or any neutral oil.
Egg-free and vegan substitution: Replace the egg with a certified GF egg replacer such as Bob’s Red Mill Egg Replacer (1 tablespoon powder plus 2 tablespoons water, left to sit for 1 minute before adding). The pancakes will be slightly less tall but fully cooked through.
How to Make Gluten Free Pancakes
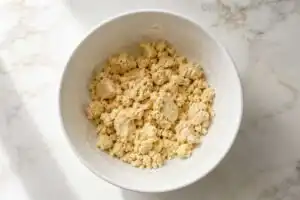
Step 1: Mix the Dry Ingredients
Add the flour blend, certified GF baking powder, xanthan gum (if using), sugar, and salt to a large mixing bowl. Whisk for 30 seconds to distribute the baking powder evenly through the flour. Uneven baking powder distribution is a common cause of inconsistent rise across a batch.
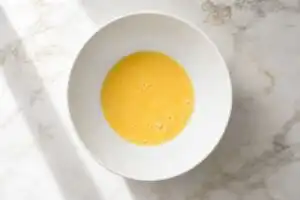
Step 2: Combine the Wet Ingredients
In a separate jug, whisk together the milk, egg, melted butter, and vanilla extract until the egg is fully incorporated. Make sure the butter is warm but not hot when it goes in. Hot butter will begin to cook the egg on contact, creating streaks in the final batter.

Step 3: Make the Batter
Pour the wet ingredients into the dry. Stir gently with a fork or silicone spatula until just combined. Stop as soon as you no longer see dry flour. Small lumps in the batter are completely normal and will cook out. Overmixing activates the starches too aggressively and produces a tough, dense pancake.

Step 4: Rest the Batter
Set the bowl aside and rest the batter for exactly 5 minutes without stirring. Here is the science: when gluten-free starch granules absorb liquid over time, they swell uniformly and form a smoother, more cohesive batter. That batter traps the CO2 bubbles from the baking powder more efficiently during cooking. The result is a pancake that rises higher and holds its structure better than one made from batter cooked immediately. In my own side-by-side tests, rested batter produced pancakes noticeably taller and lighter than batter cooked straight away. This step is worth every second.
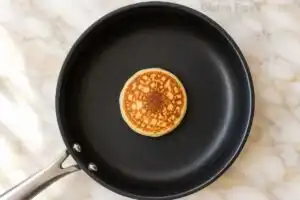
Step 5: Cook the Pancakes
Heat a nonstick skillet or griddle over medium heat. Brush lightly with butter or oil. The pan is ready when a drop of water flicked onto the surface bounces and evaporates immediately rather than sitting still. Pour 1/4 cup of batter per pancake. Do not spread or press the batter down. Let it settle naturally.
Step 6: Flip Once
Cook until bubbles form across the entire surface of the pancake and the edges look set and no longer shiny, about 2 to 3 minutes. Flip once. Press lightly with a spatula and cook for a further 1 to 2 minutes until golden brown on the underside. A properly cooked pancake will spring back slightly when pressed in the center.

Step 7: Keep Warm and Serve
Transfer finished pancakes to a plate, or keep them warm on a baking sheet in a 200°F oven while you cook the remaining batter. Serve with pure maple syrup, fresh berries, or your topping of choice.
Expert Tips for the Fluffiest Gluten Free Pancakes
Use a room-temperature egg. A cold egg straight from the fridge will partially solidify the warm melted butter the moment they meet. This creates small butter clumps in the batter. Take the egg out 10 to 15 minutes before you start.
Do not skip the rest. Five minutes feels unnecessary when you are hungry. I have tested this recipe both ways and the difference is real. Rest the batter.
Cook on medium heat, not high. High heat sets the outside crust before the interior has a chance to cook through, leaving a raw, doughy center. Medium heat gives the baking powder time to do its job before the outside locks in.
Flip only once. Every additional flip compresses the air structure built during the resting step. Flip when you see bubbles across the whole surface and edges that look dry and set.
Test your baking powder. Baking powder loses roughly 50% of its leavening power within six months at room temperature. If your pancakes come out flat and you are following the recipe precisely, expired baking powder is the most likely cause. Test it: add one teaspoon to a small bowl of hot water. It should bubble vigorously. If it fizzes weakly, replace it before you start.
Measure flour by weight when possible. Scooping flour directly from the bag compacts it and can add 20 to 30% more than intended. If you use measuring cups, spoon the flour into the cup and level with a knife. Too much flour is the second most common cause of dense GF pancakes.
Let the pan recover between batches. After each batch, give the pan 30 seconds to return to the correct temperature before pouring the next round. A pan that is too hot will burn the base before the center has cooked through.
Substitutions and Variations
Dairy-free gluten free pancakes: Swap whole milk for oat milk, almond milk, or canned coconut milk at equal volume. Replace butter with melted coconut oil or any light neutral oil. The texture holds well with either substitute.
Vegan gluten free pancakes: Use a certified GF egg replacer in place of the egg. Bob’s Red Mill Egg Replacer is a reliable, celiac-safe option.
Gluten free blueberry pancakes: Fold 1/2 cup of fresh or frozen blueberries into the rested batter just before cooking. Stir no more than twice to avoid breaking the berries into the batter.
Gluten free banana pancakes: Reduce sugar to 1 tablespoon and mash one ripe banana directly into the wet ingredients before combining. The natural sugars in banana caramelize quickly, so cook on medium-low heat.
Cinnamon spice pancakes: Add 1 teaspoon ground cinnamon and a pinch of nutmeg to the dry ingredients for a warming autumn variation.
All variations above maintain full gluten-free and celiac safety when prepared with certified GF-labelled ingredients.
What to Serve With Gluten Free Pancakes
These pancakes work well as a standalone breakfast with a simple topping. For a complete gluten-free breakfast spread, here are six pairings that work particularly well:
- Pure maple syrup and fresh strawberries for a classic, light pairing
- Fried or scrambled eggs on the side for a protein-balanced plate
- Crispy bacon or certified GF breakfast sausage for a full cooked breakfast
- A spoonful of plain Greek yogurt and a drizzle of honey for a higher-protein option
- Sliced banana with a tablespoon of almond or peanut butter for natural sweetness and healthy fat
- Lemon curd and a light dusting of powdered sugar for a weekend treat version
Browse all gluten free breakfast recipes on Gluten Free Feast.
Storage and Make-Ahead Instructions
Refrigerator: Cool the pancakes completely before storing. Stack them with a sheet of parchment paper between each one and place in an airtight container. They keep well for up to 3 days. Reheat in a toaster, in a dry skillet over low heat for 1 to 2 minutes per side, or in a microwave for 30 seconds.
Freezer: Spread cooled pancakes in a single layer on a baking sheet and freeze for 20 minutes. Transfer to a freezer-safe zip bag with parchment between each pancake to prevent sticking. They keep for up to 2 months. Reheat directly from frozen in a toaster, in a 350°F oven for 5 minutes, or in a microwave for 30 to 45 seconds.
Make-ahead dry mix: Combine all dry ingredients (flour blend, baking powder, xanthan gum, sugar, salt) and store in an airtight jar at room temperature for up to 3 months. When ready to cook, add the wet ingredients, rest the batter for 5 minutes, and cook as directed.
Why Trust This Recipe
As a molecular biologist and former laboratory analyst, I develop recipes the same way I approached lab work: with documented testing, controlled variables, and results that can be replicated in any home kitchen.
This recipe has been tested multiple rounds in my dedicated gluten-free kitchen. I have noted what fails, what works, and exactly why, so you are not just following steps but understanding the process behind them.
- Multiple test batches before publishing
- Science-based notes on key steps throughout
- Honest substitution guidance based on testing, not guesswork
- Safe for coeliac disease, with cross-contamination taken seriously at every step
Have a question? Leave a comment below. I answer every one.
Claire Donovan | Molecular Biologist and Founder, Gluten Free Feast
Frequently Asked Questions
What is the best flour to use for gluten-free pancakes?
The best flour for gluten-free pancakes is a certified 1:1 gluten-free flour blend. These blends are formulated to replace all-purpose flour cup for cup and most already contain xanthan gum. Bob’s Red Mill 1:1 Gluten-Free Baking Flour and King Arthur Measure for Measure are both reliable choices with consistent results.
How do I make gluten-free pancakes fluffy?
Four things produce a genuinely fluffy result: a certified 1:1 GF flour blend with xanthan gum, certified GF baking powder that has not expired, a five-minute batter rest before cooking to allow the starches to fully hydrate, and cooking on medium heat with a single flip. Overmixing and high heat are the two most common reasons gluten-free pancakes come out flat and dense.
Are gluten-free pancakes healthy?
Gluten-free pancakes are not automatically more nutritious than regular pancakes. Many GF flour blends are made from refined starches with a similar calorie profile to wheat flour. They are, however, essential for people with celiac disease or non-celiac gluten sensitivity. Pairing them with protein-rich toppings improves the nutritional balance considerably.
Can celiacs eat gluten-free pancakes?
Yes, provided every ingredient carries a certified gluten-free label and the pancakes are prepared in a kitchen free from cross-contamination. The most commonly missed ingredient is baking powder, which in some brands contains wheat starch as an anti-caking agent. Use dedicated cookware that has never been in contact with gluten-containing foods.
Can you freeze gluten-free pancakes?
Yes. Cool the pancakes completely, then freeze them in a single layer on a baking sheet for 20 minutes before transferring to a freezer bag with parchment paper between each one. They keep well for up to two months. Reheat directly in a toaster, in a 350°F oven for five minutes, or in the microwave for 30 to 45 seconds.
Final Thoughts
These gluten free pancakes have earned a permanent spot in my breakfast rotation, and once you try the rested batter method, I think they will earn one in yours too. Make this recipe, then leave a star rating and a comment below. I read and respond to every one.
