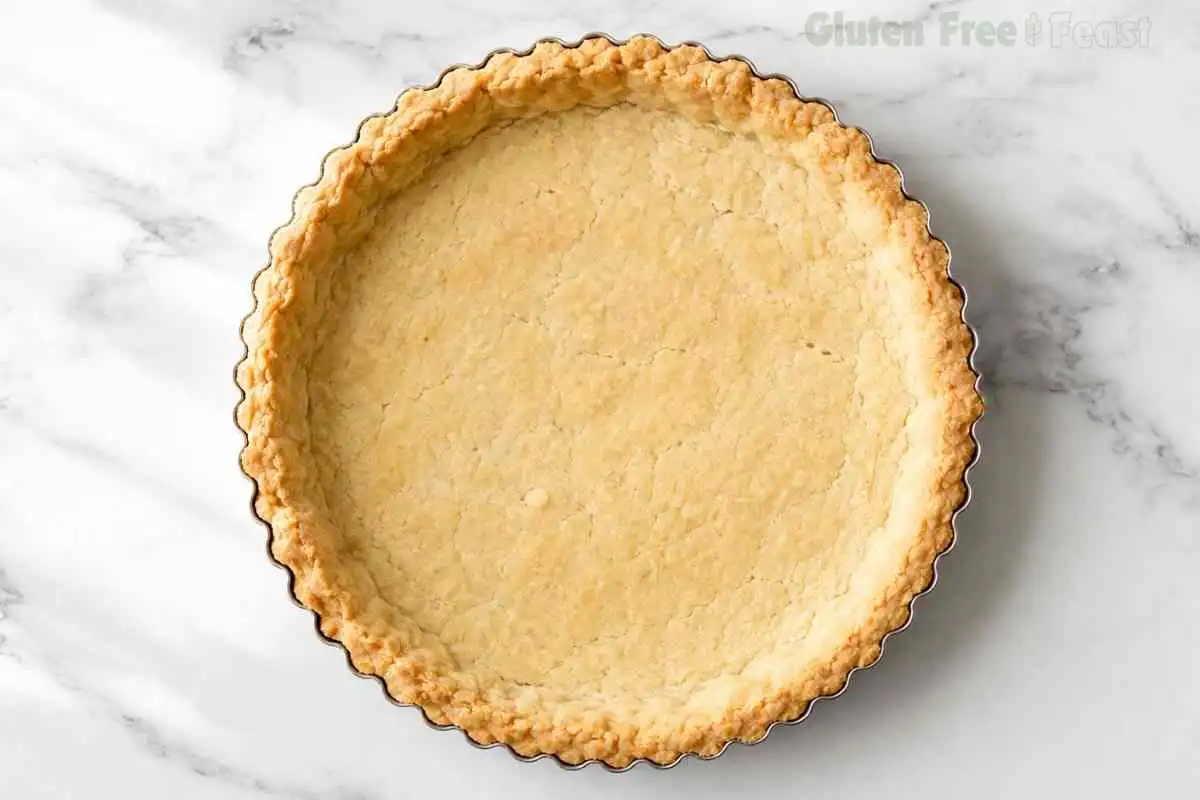
The first time a gluten free pie crust came out without cracking, I stood at my counter for a moment before doing anything else. Six batches to get there. The seventh one inverted cleanly into the pan and baked into a golden, flaky shell. My father-in-law, who has strong opinions about pastry, had two slices and did not ask what flour I used.
That result is exactly what this recipe is built to produce. A celiac-safe gluten free pie crust that handles well, bakes up tender and flaky, and works for every filling from pumpkin to quiche. The key is the right combination of cold fat, a GFCO-certified flour blend, and a full hour of chilling time.
If you have tried a gluten free pie crust before and ended up with something that crumbled or shrank away from the pan, keep reading. The science behind each of those failures, and exactly how to avoid them, is what this recipe is built around.
Key takeaways
This gluten free pie crust uses GFCO-certified King Arthur Measure for Measure flour, cold butter, and cold gluten-free vegetable shortening (Crisco All-Vegetable Shortening, labeled GF) to produce a tender, flaky celiac-safe crust in one 9-inch shell.
The dough requires at least 1 hour of refrigerator chilling to allow the GF flour to fully hydrate and make it rollable without cracking. Blind-baking at 400°F (204°C) with pie weights is required for cream and no-bake fillings (15 min with weights, then 8 to 12 min without); par-baking for 10 to 15 minutes with weights is the method for fruit pies, quiche, and pumpkin pie.
The crust is celiac-safe when all flagged ingredients carry certified GF labels, and includes tested dairy-free (Miyoko’s Creamery or Earth Balance) and vegan options.
Prep Time: 20 mins · Chiling Time: 1 hr · Total Time: 1 hr and 20 mins · Yield: 1 (9-inch) crust
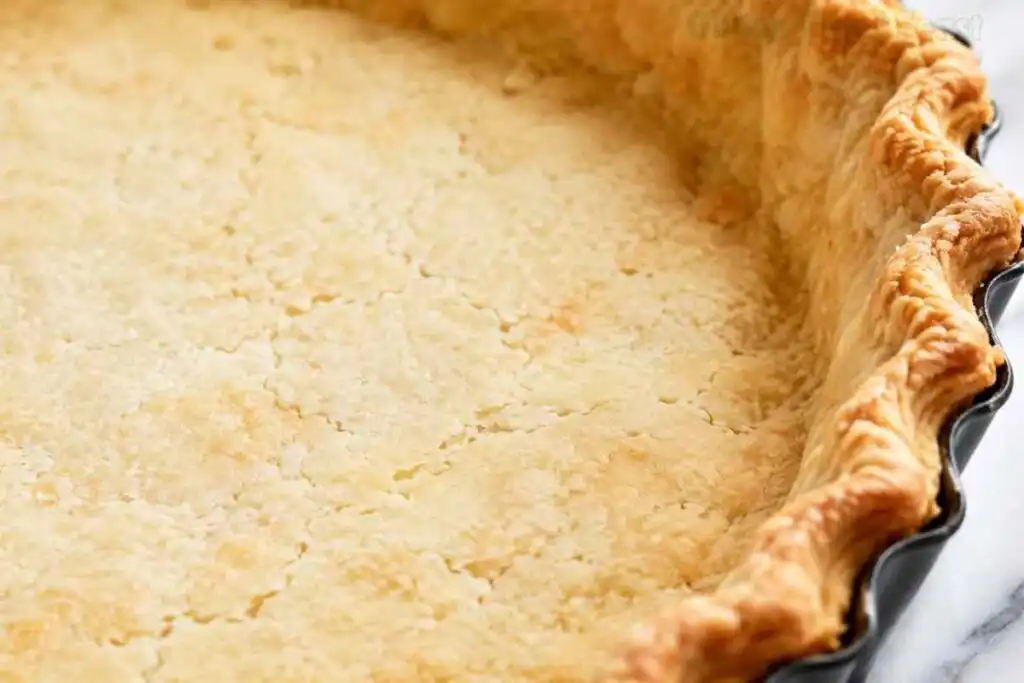
Table of Contents
Why You Will Love This Gluten Free Pie Crust Recipe
- Tender, flaky texture without wheat flour: cold butter and shortening work together to create the steam pockets that give a classic pie crust its pull-apart texture, even in a gluten free dough.
- GFCO-certified ingredients named at every flagged step: King Arthur Measure for Measure is GFCO certified and produced in a dedicated gluten free facility. No generic “gluten free” label claims without certification behind them.
- Works for sweet and savory fillings: pumpkin pie, quiche, apple, pecan, pot pie, and more. This is a flexible base crust, not a single-use recipe.
- Make-ahead friendly: the dough holds in the refrigerator for 3 days and freezes well for up to 3 months.
- Dairy-free and vegan options fully tested: with named brand callouts and notes on what changes and what stays the same.
- A dedicated cross-contact safety section: covering rolling pin, pie plate, pastry cutter, parchment paper, and workspace, because equipment is where celiac safety breaks down most often in pastry work.
The Science Behind Gluten Free Pie Crust
Understanding why a gluten free pie crust behaves differently from a wheat crust makes every step in this recipe easier to execute correctly.
Why cold fat creates flaky layers: when cold pieces of butter or shortening hit a hot oven, they release steam as they melt. That steam forces the thin layers of dough apart, creating the visible, pull-apart flakes of a classic crust. Warm fat melts gradually into the flour before it reaches the oven, coating the starch rather than staying in distinct pieces. The result is a dense, mealy texture instead of a flaky one.
Why xanthan gum replaces gluten’s elasticity: wheat flour contains gliadin and glutenin proteins that combine with water to form gluten. That stretchy network holds dough together and gives it rollable elasticity. Gluten free flour blends have no such network. Xanthan gum, a fermented polysaccharide, mimics gluten’s binding role by forming a gel-like structure with water.
Without it in the blend, the dough crumbles on contact. Most quality GF blends, including King Arthur Measure for Measure, already contain xanthan gum.
Why apple cider vinegar improves GF dough structure: in traditional pastry, a small amount of acid inhibits gluten development and keeps the crust tender. In a GF crust, the acid in apple cider vinegar interacts with the egg proteins, tightening the overall structure and improving browning. It also makes the dough noticeably easier to handle during rolling.
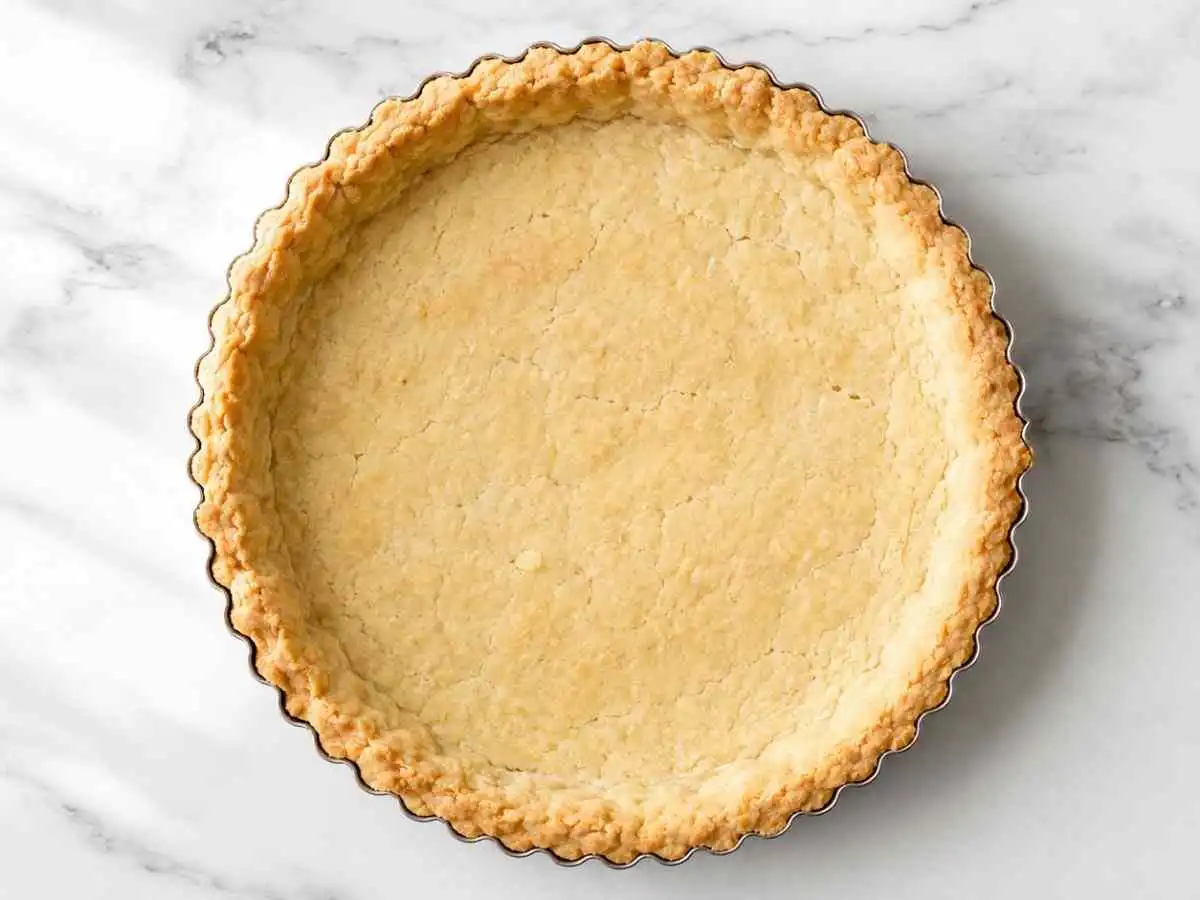

Gluten Free Pie Crust
Ingredients
Equipment
Method
- Cut the butter into small cubes and place in the freezer along with the measured shortening. Put the measured water in a small bowl in the refrigerator. Set a timer for 5 to 10 minutes. While waiting, whisk together the King Arthur GF flour, sugar, and salt in a large mixing bowl.
- Add the cold butter cubes and cold shortening to the flour mixture. Using a pastry cutter or fork, work the fat into the flour until the mixture resembles coarse crumbs with visible pea-sized pieces of fat remaining. Do not overmix to a fine sandy powder; distinct fat pieces are what create flaky layers in the oven.
- Add the apple cider vinegar, cold egg, and ice water. Stir just until the dough comes together and no dry flour patches remain. The dough should be soft, slightly sticky, and hold together when pressed. If crumbly, add ice water one teaspoon at a time.
- Shape the dough into a ball and flatten into a 1-inch thick disc. Wrap tightly in plastic wrap. Refrigerate for at least 1 hour. Do not skip this step: it allows the GF flour to fully hydrate and firms the fat so the dough is rollable without cracking.
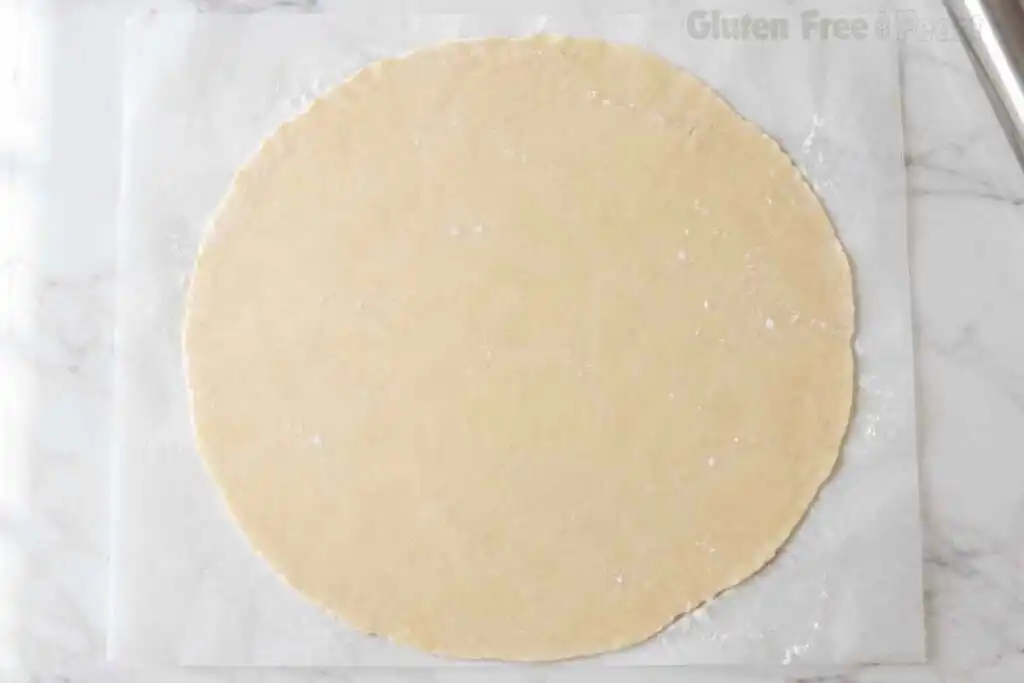
- Remove the dough from the refrigerator and let it sit at room temperature for 10 to 15 minutes. Place the dough disc between two sheets of lightly floured parchment paper. Roll outward from the center into a 10 to 12 inch circle, approximately 1/8 inch thick. Use only your tested certified GF flour blend for dusting.
- Remove the top sheet of parchment. Carefully invert the dough over a greased 9-inch pie plate. Gently press into the bottom and sides. Do not stretch the dough; lift and press only. Stretching causes shrinkage during baking. Trim the excess and crimp the edges as desired.
- Preheat the oven to 400 degrees F (204 degrees C). Line the crust with parchment paper and fill with pie weights or dried beans all the way to the top of the crust. Bake for 15 minutes. Remove weights and parchment. Continue baking for 8 to 12 minutes until lightly golden. Use for no-bake, custard, and cream pie fillings.
- Preheat the oven to 400 degrees F (204 degrees C). Line the crust with parchment paper and fill with pie weights. Bake for 10 to 15 minutes only. Remove from oven and proceed with your pie recipe. Use for fruit pies, quiche, pumpkin pie, and pecan pie.
Nutrition
Notes
Gluten-Free Note
Tried this recipe?
Let us know how it was!Ingredients
For the Pie Crust
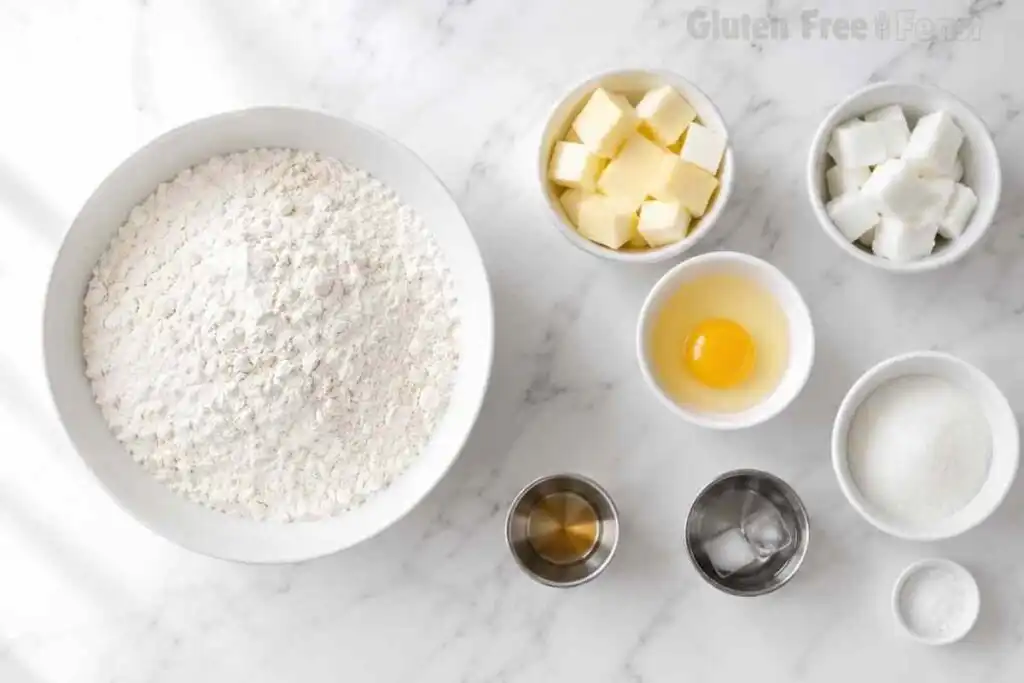
- 1¼ cups (175g) King Arthur Measure for Measure Gluten-Free Flour (GFCO certified), plus extra for dusting
- 2 tablespoons granulated sugar
- ¼ teaspoon fine salt
- ¼ cup (57g) unsalted butter, cold and cut into small cubes
- ¼ cup (48g) gluten-free vegetable shortening (Crisco All-Vegetable Shortening, labeled GF), cold
- ¼ teaspoon apple cider vinegar
- 1 large egg, cold
- 3 tablespoons ice-cold water
Ingredient Notes and Substitutions
GFCO-certified gluten free flour blend: King Arthur Measure for Measure is the flour I recommend and tested for this recipe. It is GFCO certified, produced in a dedicated gluten free facility, and already contains xanthan gum. Bob’s Red Mill 1-to-1 Baking Flour is a second reliable option and also carries certification.
Do not use Pillsbury Gluten-Free All-Purpose Flour for celiac-safe baking. As of this writing, it carries a self-declared gluten free claim without GFCO or equivalent third-party certification. For a pie crust intended to be celiac-safe, use a GFCO-certified blend.
Butter and shortening together: butter contributes flavor and color; shortening contributes structural stability and a more tender, workable texture. If you substitute all butter for the shortening, the dough will be slightly less forgiving to roll and may shrink more during baking. Keep both cold.
Apple cider vinegar: you need only one-quarter teaspoon, and it matters. The acid tightens the dough structure in a way that makes the crust noticeably easier to transfer and less prone to cracking at the edges. Do not omit it.
Dairy-free option: replace the butter with Miyoko’s Creamery European Style Cultured Vegan Butter or Earth Balance Buttery Sticks. Confirm the current label for a certified GF symbol. Keep whichever you use very cold before using.
Vegan option: replace the butter with a plant-based baking stick as above. For the egg, use a certified GF egg replacer. Bob’s Red Mill Egg Replacer is one option; verify the current GFCO status on the packaging before use.
Celiac Safety Note: confirm that all packaged ingredients carry a certified gluten free label before use. The flagged ingredients for this recipe are the GF flour blend, the vegetable shortening, and any egg replacer. Use King Arthur Measure for Measure (GFCO certified), Crisco All-Vegetable Shortening (labeled GF), and Bob’s Red Mill Egg Replacer (verify current GFCO status).
Cross-contact at the ingredient level is only one risk. See the Cross-Contact Safety section below for equipment risks that matter equally for celiac safety.
Blind Bake vs. Par-Bake
This gluten free pie crust is used two ways. Knowing which method your filling requires will prevent a raw pastry base or an overbaked edge.
| Method | When to Use It | What It Looks Like When Done |
|---|---|---|
| Fully baked (blind bake) | No-bake fillings, custard pies, cream pies, lemon meringue | Deep golden brown, dry to the touch on the bottom |
| Par-baked | Fruit pies, quiche, pot pie, pumpkin pie, pecan pie | Light golden, slightly underdone at center, firm enough to hold filling |
The difference in bake time is significant: a fully baked crust goes 15 minutes with weights, then 8 to 12 minutes without. A par-baked crust goes 10 to 15 minutes with weights, then comes straight out to receive the filling.
Getting this distinction wrong is a common reason a GF pie ends up with an uncooked pastry base. The filling was added to an under-baked crust that never had a chance to finish cooking beneath the wet filling. Choosing the right method is as important as any step in the mixing process.
How to Make Gluten Free Pie Crust
Step 1: Chill the Ingredients
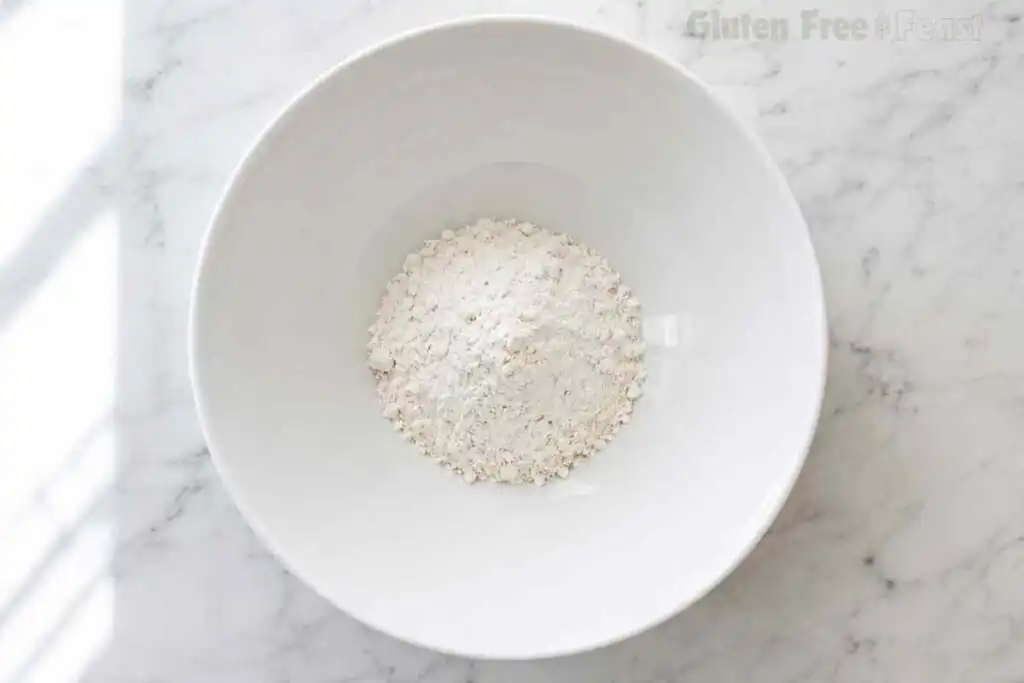
Cut the butter into small cubes and place them in the freezer along with the measured shortening. Put the measured water in a small bowl in the refrigerator. Set a timer for 5 to 10 minutes.
While you wait, whisk together the flour, sugar, and salt in a large mixing bowl. Those cold fat pieces are doing specific structural work: the goal is to keep them intact as separate pieces into the oven. There, they will release steam and force the dough layers apart. Every minute they spend at room temperature works against that goal.
Step 2: Make the Dough
Add the cold butter cubes and cold shortening to the flour mixture. Using a pastry cutter or fork, work the fat into the flour until the mixture resembles coarse crumbs with visible pea-sized pieces of fat remaining. The correct stopping point looks rougher and less uniform than you might expect. You want distinct fat pieces, not a fine sandy powder.
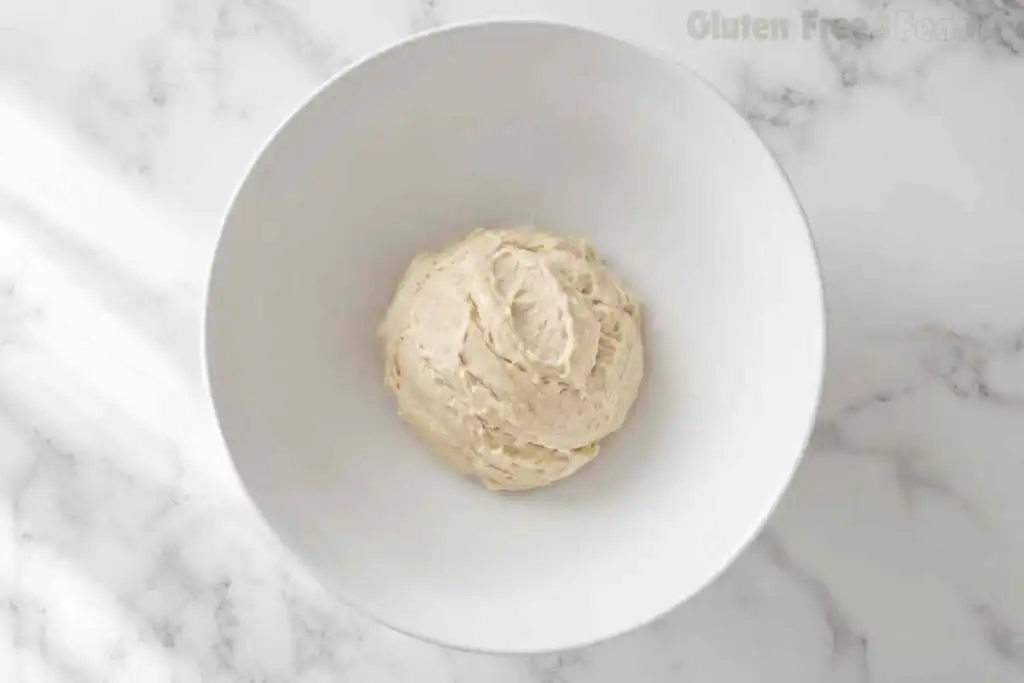
Add the apple cider vinegar, cold egg, and ice water. Stir just until the dough comes together with no dry flour patches remaining. Over-mixing a gluten free pie crust dough activates the starches in the flour blend and makes the finished crust dense and hard to roll. The dough should be soft, slightly sticky, and hold together when pressed.
If the dough is crumbly and will not press into a ball, add ice water one teaspoon at a time. If it sticks heavily to your hands, the fat has warmed: shape it quickly and get it into the refrigerator.
Step 3: Chill the Dough
Shape the dough into a ball and flatten it into a 1-inch thick disc. Wrap it tightly in plastic wrap. Refrigerate for at least 1 hour. Do not skip this step.
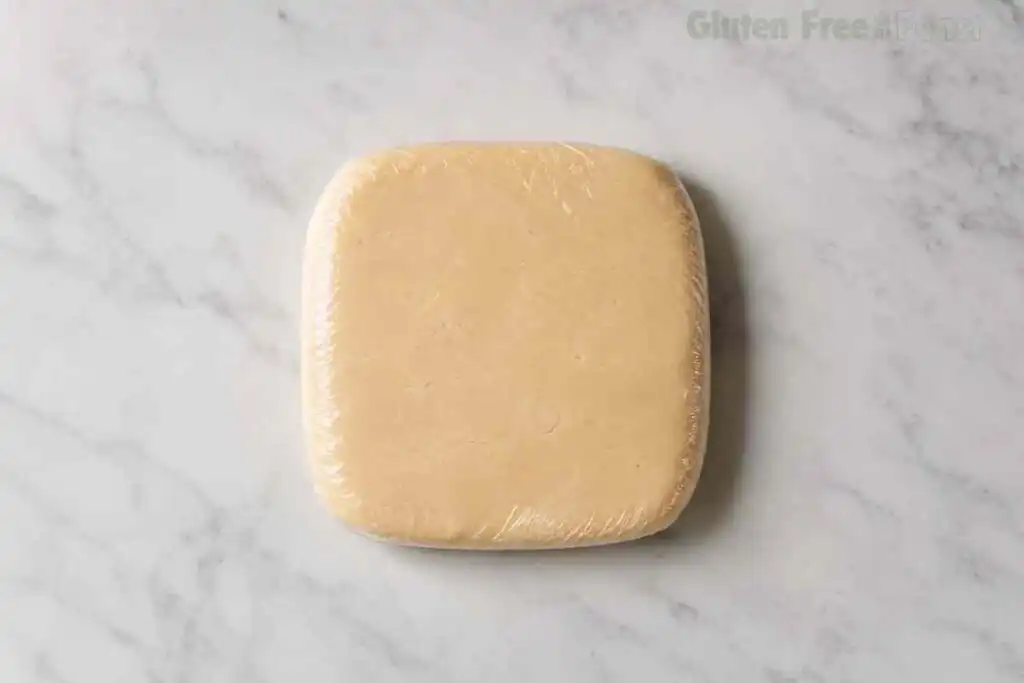
In my testing, 30 minutes produced a workable dough that still cracked slightly at the edges during rolling. One hour produced noticeably cleaner edges and easier transfer to the pan. The resting period allows the GF flour to fully hydrate, which makes the dough more pliable. It also firms the fat back to the temperature where it holds its piece structure through rolling.
Step 4: Roll Out the Dough
Remove the dough from the refrigerator and let it sit at room temperature for 10 to 15 minutes. GF dough is less forgiving than wheat dough when very cold: it cracks at the edges rather than stretching. That brief warm-up gives it just enough flexibility to roll without splitting.
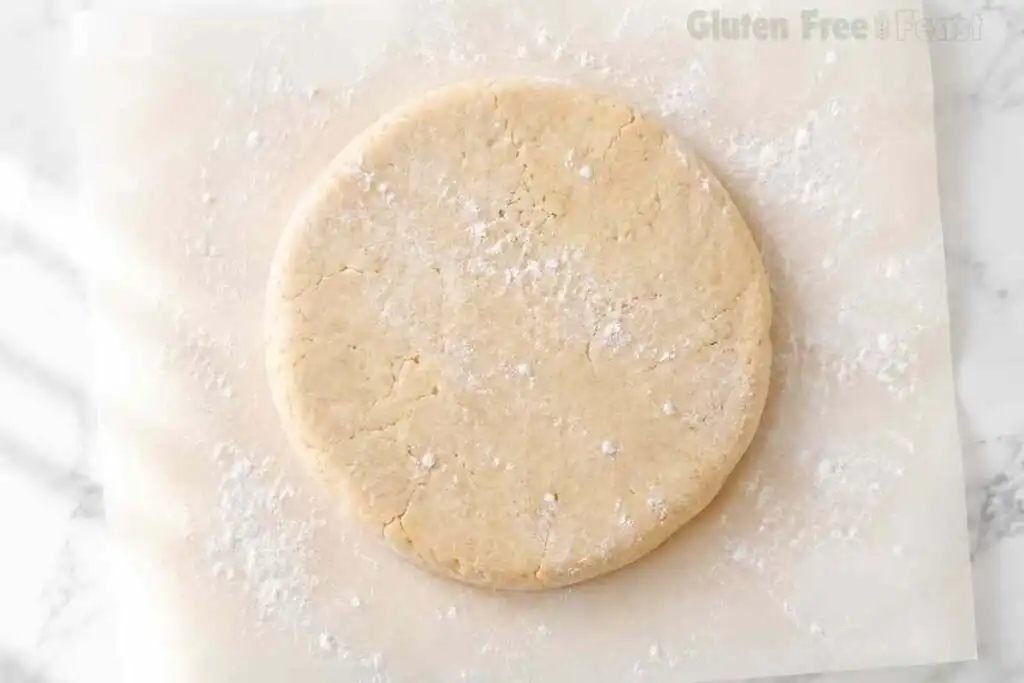
Place the dough disc between two sheets of lightly floured parchment paper. Roll outward from the center in all directions into a 10 to 12 inch circle, approximately ⅛ inch thick. Using parchment on both sides eliminates the sticking problem that plagues most GF pastry work. Use only your tested GF flour blend for dusting, never a different flour from another bag on the counter.
Step 5: Fit the Crust and Bake
Remove the top sheet of parchment. Carefully invert the dough over a greased 9-inch pie plate. Gently press into the bottom and sides.
Do not stretch the dough to reach any section; stretching creates tension that pulls the sides down into the pan during baking. Lift and press, never pull.
Trim the excess dough and crimp the edges as desired.
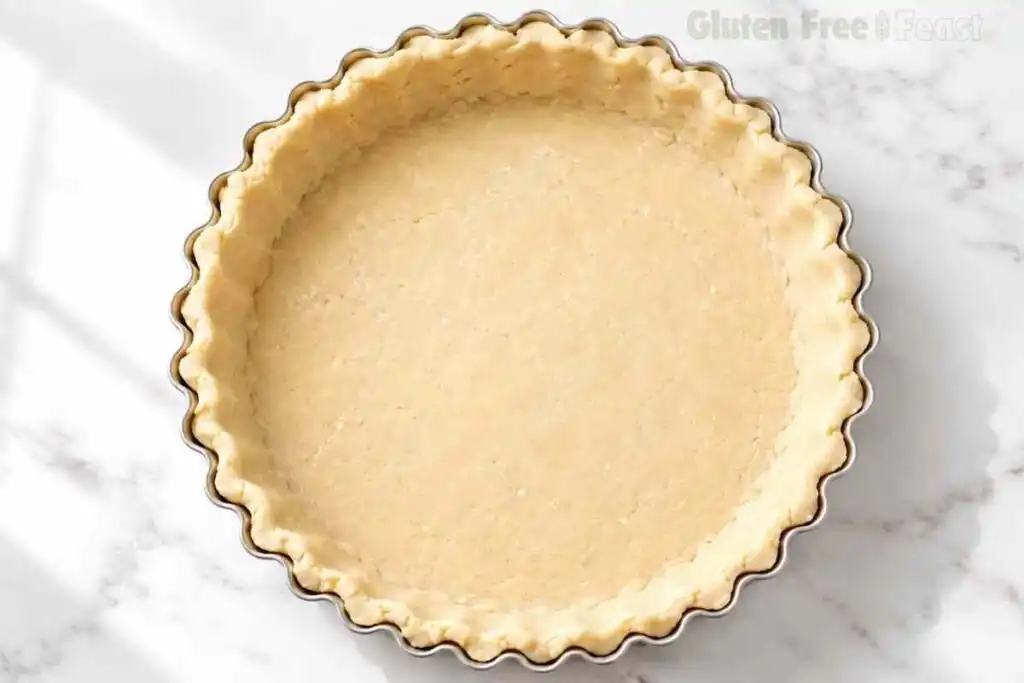
Fully baked crust: preheat the oven to 400°F (204°C). Line the crust with parchment and fill with pie weights all the way to the top. Bake for 15 minutes, remove the weights and parchment, then bake for 8 to 12 more minutes until lightly golden.
Par-baked crust: preheat to 400°F, line with parchment and pie weights, and bake for 10 to 15 minutes only. Remove from the oven and proceed with your pie recipe.
Expert Tips for Best Results
- Weigh the flour if you can. The recipe calls for 1¼ cups, but cup measurements of GF flour vary significantly depending on how the flour settles in the bag. 175g is the target. If measuring by volume, use the spoon-and-level method: spoon the flour into the cup and level with a straight edge. Scooping directly from the bag packs the flour and can add up to 20% more than intended, which dries out the dough.
- Return to the refrigerator if the dough softens. GF dough warmed by your hands will start to stick and tear. If the dough feels greasy or starts to pull apart, wrap it and return it to the refrigerator for 10 to 15 minutes before continuing. This is the most common reason gluten free pie crust fails mid-roll.
- Never stretch the dough into the pan. Lift and press instead. GF dough does not have the elasticity of wheat dough to spring back slowly. It snaps back immediately in the oven, which is why so many GF pie crusts end up with sunken sides.
- Repair cracks with your fingertips. If a crack appears during rolling or transfer, press it back together firmly while the dough is cold. GF dough repairs cleanly at low temperatures. At room temperature, the repair is less reliable.
- Use pie weights, not just parchment. Parchment alone does not provide enough resistance to keep GF pastry sides from slumping during blind baking. Fill the parchment liner all the way to the top of the crust. Dried rice or lentils work as well as ceramic weights.
- Do not skip the egg. The egg acts as a binder and gives the crust its golden color. A GF crust without egg is noticeably more fragile and paler after baking. If making the vegan version, use a certified GF egg replacer designed for structural binding.
- Check at 15 minutes for a fully baked crust. Ovens vary. Look for a deep, even golden color that extends to the center of the base, not just the crimped edges. A pale base means more time.
Cross-Contact Safety for Celiacs
Pie crust is one of the highest-risk baking tasks for celiac safety, because the equipment involved in pastry work is almost impossible to clean thoroughly. The flour residue problem extends far beyond just the flour you choose.
- Rolling pin: use a dedicated GF rolling pin. Wooden rolling pins are porous: flour embeds in the grain and does not wash out. A smooth stainless steel or dedicated silicone rolling pin is the safest option. If you only have a wooden rolling pin, use the two-parchment method in Step 4 so the rolling pin never touches the dough directly.
- Pie plate: glass or smooth metal pie plates are the safest choice. Avoid scratched non-stick pie plates: the scratches trap flour residue that survives normal washing. Wash your pie plate thoroughly with hot soapy water before use, or run it through the dishwasher.
- Pastry cutter: metal pastry cutters can be cleaned safely if they have no cracks or pitting. Avoid any pastry cutter that has been used extensively with wheat flour and shows visible wear. A fork is a safe and effective alternative.
- Parchment paper: never reuse parchment that has been in contact with wheat-flour doughs. Use a fresh sheet every time.
- Workspace: wipe down your counter with a damp cloth before rolling. If wheat flour has been used for nearby baking, the airborne particles can settle on your workspace surface. A sheet of fresh parchment under your work area is an additional precaution.
- Flour for dusting: only use your tested, certified GF flour blend for dusting surfaces. Reaching for a different flour bag in the middle of rolling is a cross-contact risk that is easy to eliminate by keeping your GF flour at the front of the counter.
Dairy-Free and Vegan Options
Both modifications work. The key difference to manage is fat temperature: plant-based butters often soften faster than dairy butter, which makes cold handling more important, not less.
For a dairy-free gluten free pie crust, replace the butter with Miyoko’s Creamery European Style Cultured Vegan Butter or Earth Balance Buttery Sticks. Confirm the current GF label on whichever brand you choose. Keep it frozen until 5 minutes before cutting. The finished crust is slightly less rich in flavor but holds together well and bakes up golden.
For a vegan version, make the dairy-free swap above and replace the egg with a certified GF egg replacer prepared according to the package directions. Bob’s Red Mill Egg Replacer is one option; verify the current GFCO status on the packaging before use. The vegan crust is slightly more fragile during transfer: keep it very cold and use the parchment inversion method every time.
What to Make With This Gluten Free Pie Crust
This crust is designed to work with any standard 9-inch pie filling, sweet or savory. Here are the recipes I reach for most often.
- Quiche: this crust handles a savory custard filling exceptionally well. Use the par-baked method with weights, then add your quiche filling to the warm shell. GFF has a fully tested recipe at gluten free quiche that pairs directly with this crust.
- Pumpkin pie: use the par-baked method. The 10 to 15 minute par-bake gives the base enough structure to hold a wet pumpkin custard without a raw pastry center.
- Apple pie: par-baked. A double-crust apple pie works well with this recipe: make a double batch, shape the dough into two equal discs, and roll each one out separately to fit a standard 9-inch plate.
- Pecan pie: par-baked. The high sugar filling bakes at a lower temperature, so a well-par-baked crust is important to avoid an underdone base.
- Sweet GF baking alongside this crust: for a holiday dessert spread, gluten free banana bread is a reliable make-ahead option, gluten free chocolate chip cookies are an easy addition to a dessert table, and the gluten free carrot cake with cream cheese frosting is fully celiac-safe with GFCO-certified ingredients throughout.
Storage and Make-Ahead Instructions
Unbaked dough (refrigerator): wrap the disc tightly in plastic wrap and refrigerate for up to 3 days. The dough is actually easier to roll on day two, once it has fully hydrated.
Unbaked dough (freezer): wrap the disc in plastic wrap, then place it inside a freezer-safe zip bag. Freeze for up to 3 months. Thaw overnight in the refrigerator; do not thaw at room temperature, as the fat softens unevenly and makes the dough greasy and hard to roll. A properly thawed gluten free pie crust dough is indistinguishable from freshly made.
Baked crust (room temperature): an unfilled, fully baked crust keeps at room temperature covered with plastic wrap for up to 2 days. Store in the pie plate it was baked in.
Baked crust (refrigerator): an unfilled baked crust keeps in the refrigerator for up to 5 days. Bring to room temperature before filling.
Why Trust This Recipe
I develop recipes the same way I approached lab work: documented testing, controlled variables, and results that hold up in any kitchen, not just mine.
This gluten free pie crust recipe was tested across six batches in my dedicated gluten free kitchen. Specific rounds compared 30-minute versus 1-hour chill times, all-butter versus butter-and-shortening fat combinations, and two different GFCO-certified flour blends. I documented what cracked, what shrank, and what baked up clean.
What that means for you:
- Six test batches before publishing, with variables documented
- Science-based notes on cold fat, xanthan gum, and dough structure throughout
- Honest substitution guidance, not guesswork
- Safe for celiac disease, with GFCO-certified brand callouts at every flagged ingredient and a dedicated cross-contact safety section
Frequently Asked Questions
What are common problems with gluten free crust?
The three most common issues are crumbly dough, shrinkage during baking, and a gritty texture. Crumbly dough usually means the fat was not cold enough, or too much flour was added during rolling. Shrinkage is almost always caused by stretching the dough into the pan rather than lifting and pressing it. Gritty texture is a flour blend issue: switching to a rice-based GFCO-certified blend like King Arthur Measure for Measure solves it in most cases.
Does gluten free pie crust taste the same as regular?
A well-made gluten free pie crust using butter and a quality GFCO-certified flour blend tastes remarkably close to a traditional wheat pie crust. The texture is tender and flaky, and the flavor is buttery without any significant aftertaste. Rice-based blends have the least noticeable aftertaste of the commonly available options. Most people at my table cannot tell the difference.
What are common mistakes when making gluten free dough?
There are five mistakes that come up repeatedly in gluten free pie crust:
1- Using fat that has warmed to room temperature before mixing
2- Over-mixing the dough past the point where it just comes together
3- Adding too much water and making the dough too wet to roll
4- Skipping the 1-hour chill step
5- Using a non-certified GF flour that introduces cross-contact risk
The sixth mistake, which trips up experienced bakers too, is stretching the dough into the pan rather than lifting and pressing it in.
Is there a ready-made gluten free pie crust?
Yes. Wholly Gluten-Free, Mi-Del, and Schar all produce ready-made GF pie crusts or shells. Trader Joe’s has also carried a GF pie shell seasonally. None of these replicate the texture of a from-scratch crust, and some are made in shared facilities with only a self-declared GF label. For celiac safety, homemade with a GFCO-certified flour blend is the most reliable option.
Are any Pillsbury pie crusts gluten free?
No. Standard Pillsbury refrigerated pie crusts contain wheat flour and are not safe for celiac disease. Pillsbury does make a gluten free all-purpose flour blend, but that product is self-declared GF rather than GFCO certified. The ready-made pie crust is not a GF product at all. For any celiac-safe gluten free pie crust, use only ingredients with verified GF labeling.
Can I freeze gluten free pie crust dough?
Yes. Shape the dough into a disc, wrap it tightly in plastic wrap, place it in a freezer-safe bag, and freeze for up to 3 months. Thaw overnight in the refrigerator before rolling. Never thaw at room temperature. The fat melts unevenly, which compromises the steam pocket structure that creates flaky layers before the crust ever reaches the oven.
Why did my gluten free pie crust crack when I rolled it?
Cracking during rolling comes from two things: under-chilled dough (less than 1 hour), or dough that is too cold and rigid when you start rolling. The first problem means the GF flour has not fully hydrated. The second means the dough is too stiff to flex without cracking. Always chill for the full hour, then rest at room temperature for 10 to 15 minutes before you start.
Final Thoughts
A reliable celiac-safe gluten free pie crust is one of the most useful things you can have in your GF baking toolkit. Once you have made it twice and felt what the right dough texture is like, it becomes second nature. Make a double batch this weekend, freeze one disc, and you will have a ready-to-roll crust waiting whenever a pie comes up.