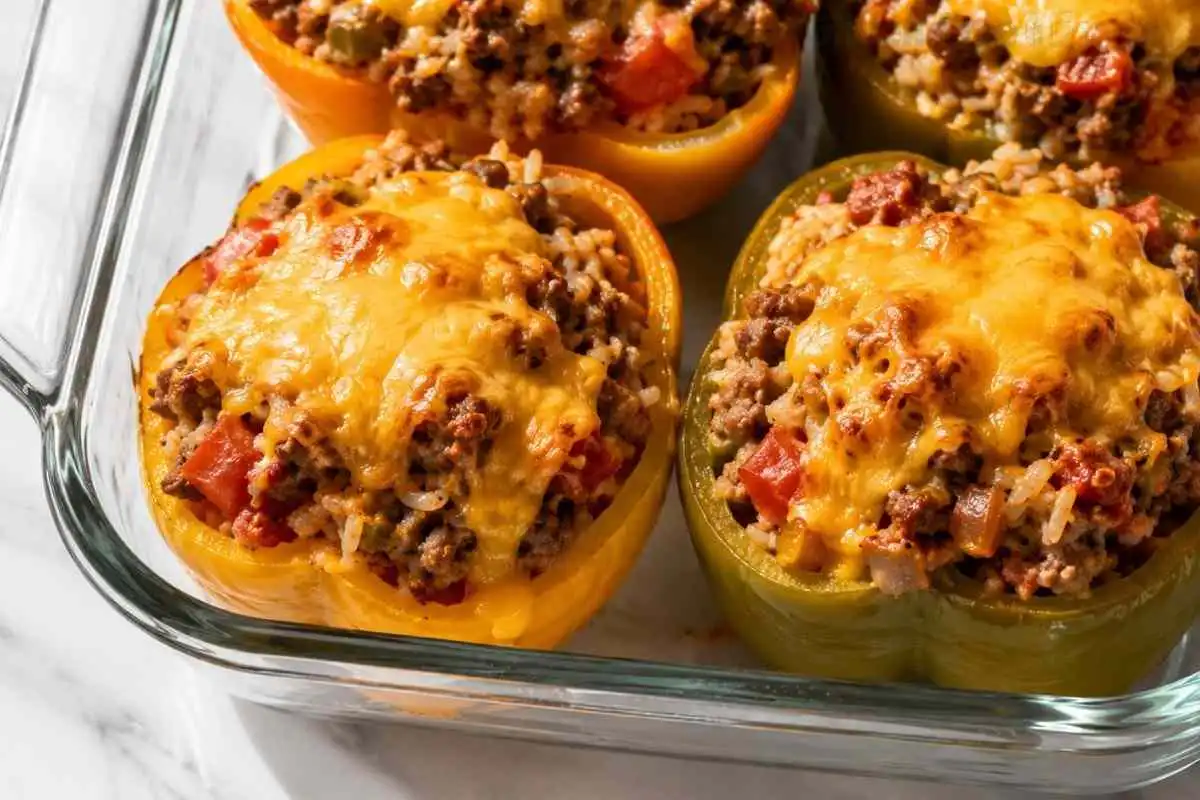
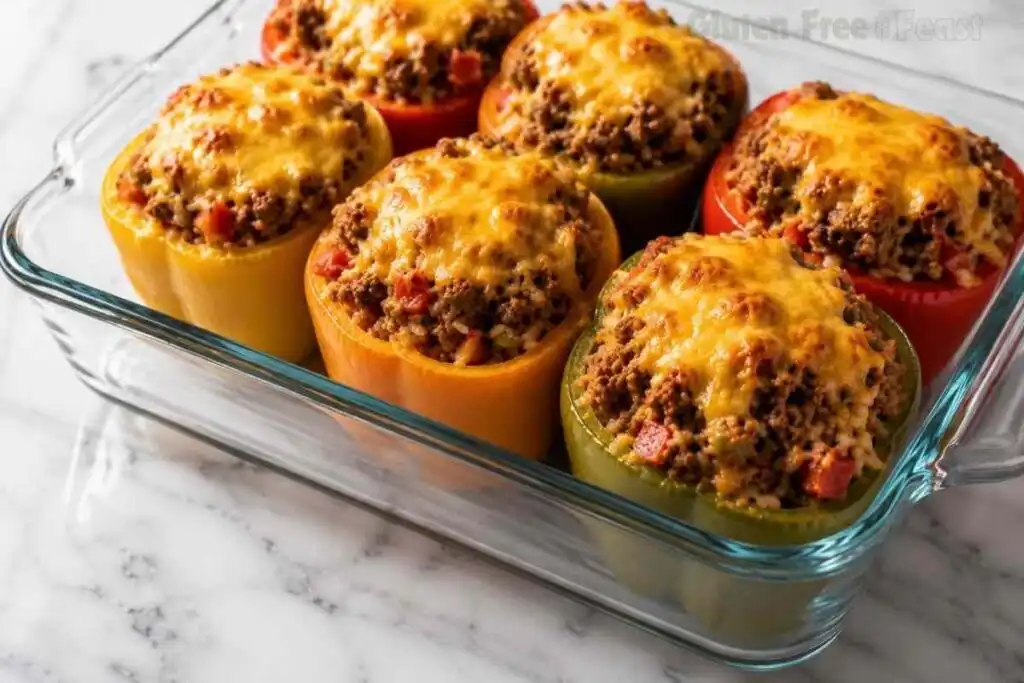
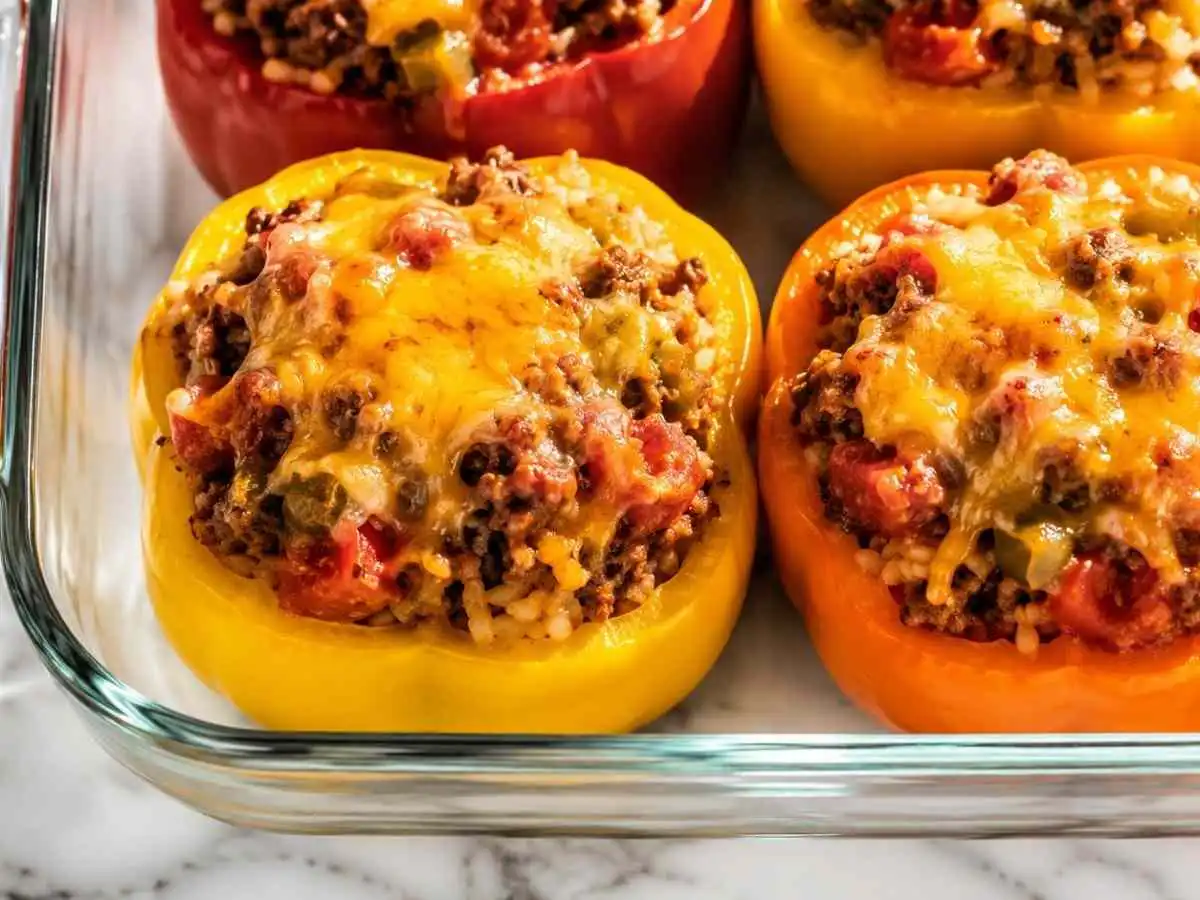
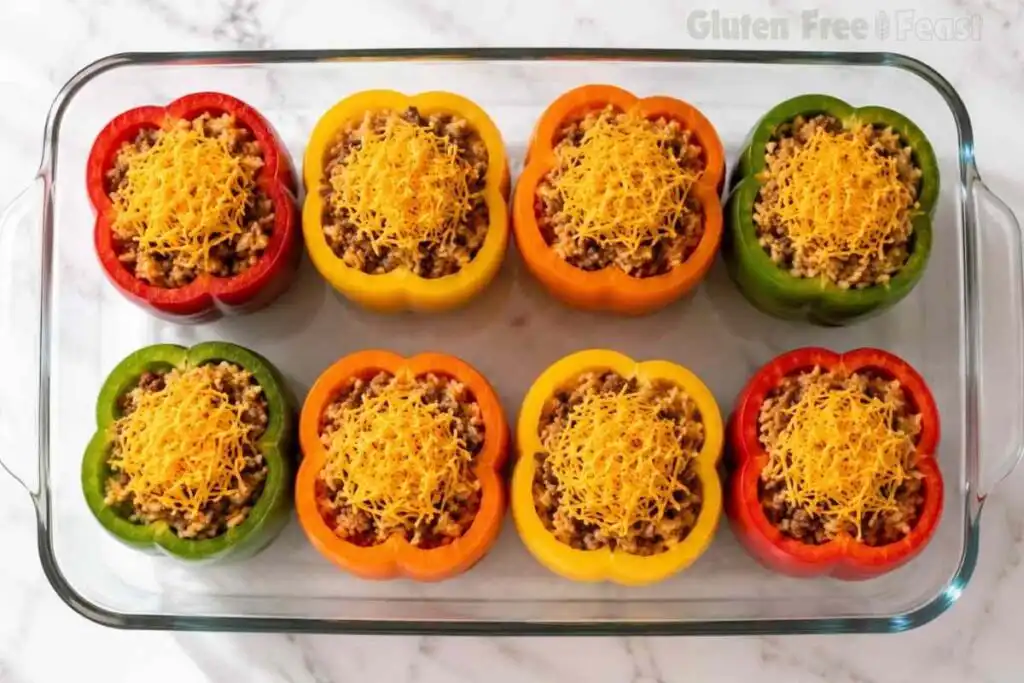
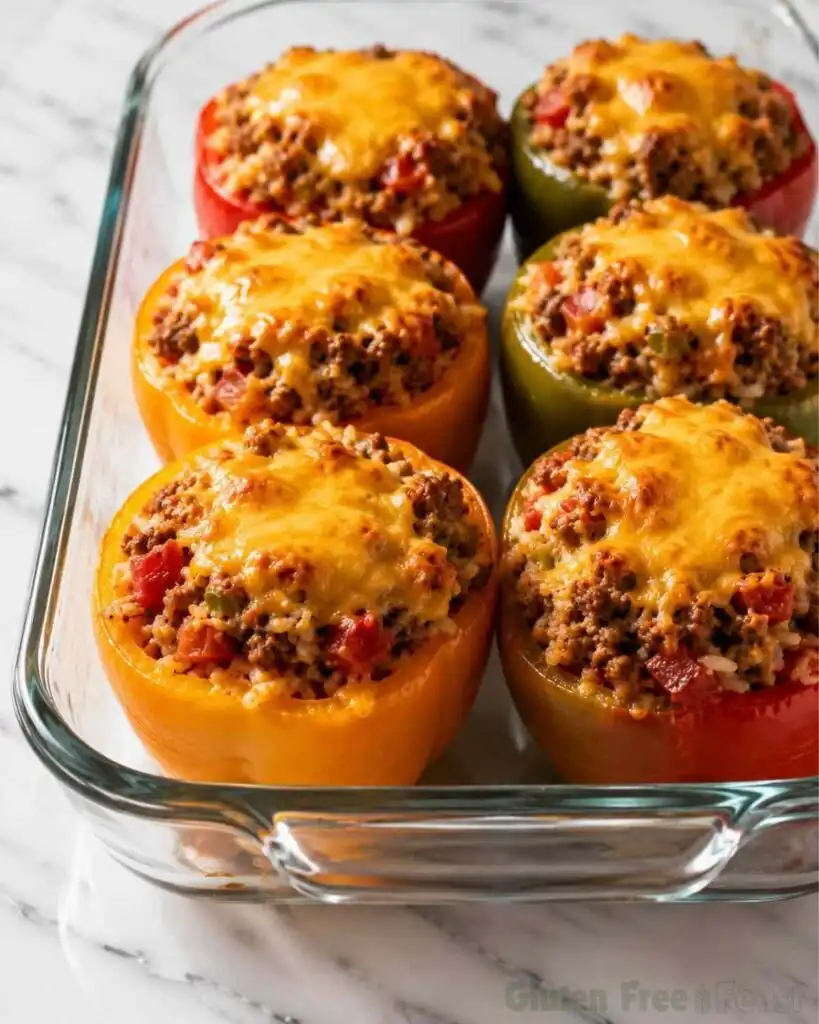
There is something about a pepper standing upright on a plate that makes a weeknight dinner feel like an event. The filling spills slightly over a golden cap of melted cheddar. These gluten free stuffed peppers are built around a familiar combination: seasoned ground beef, tender basmati rice, and a …
There is something about a pepper standing upright on a plate that makes a weeknight dinner feel like an event. The filling spills slightly over a golden cap of melted cheddar. These gluten free stuffed peppers are built around a familiar combination: seasoned ground beef, tender basmati rice, and a tomato base. After several rounds of testing, I landed on the exact parboil time and filling ratio that keeps every pepper tender.
Bell peppers are naturally gluten free, so this dish is celiac-safe at its foundation. The only ingredients that need a closer look are the packaged ones: canned tomatoes, Worcestershire sauce, and shredded cheese. I will walk through exactly what to check for each one. I will also cover the cross-contact habits that matter most when cooking for someone with celiac disease.
This recipe also happens to be one of the easiest make-ahead dinners in my rotation. Keep reading for the full ingredient breakdown, the step-by-step method, and answers to the most common questions readers ask about stuffed peppers.
Key takeaways
Gluten free stuffed peppers are naturally celiac-safe at their core: bell peppers, rice, and ground beef contain no gluten, so the only risk comes from packaged add-ins like canned tomatoes, Worcestershire sauce, and shredded cheese.
This recipe bakes 8 stuffed peppers at 350°F for 30 minutes, filled with seasoned ground beef, basmati rice, and 1½ cups of freshly shredded mild cheddar cheese. Parboiling the peppers in salted water for 5 minutes before stuffing softens the pepper walls so they finish tender rather than crunchy after the shorter second bake in the oven. The dish is freezer-friendly for up to 3 months, reheats well from the refrigerator for up to 4 days, and can be assembled up to 24 hours ahead and refrigerated unbaked before baking.
Prep Time: 30 mins · Cook Time: 30 mins · Total Time: 60 mins
Table of Contents
Why You Will Love This Gluten Free Stuffed Peppers Recipe
Naturally gluten free base: bell peppers, rice, and ground beef contain no gluten on their own, so this dish starts celiac-safe before you even open a can.
One dish, complete meal: protein, grain, and vegetables are all built into the pepper, so you do not need to plan a separate side unless you want one.
Freezer-friendly: baked peppers freeze well for up to 3 months, which makes this a genuinely useful meal-prep recipe, not just a dinner.
Make-ahead simple: assemble the peppers up to 24 hours in advance and refrigerate unbaked until you are ready to cook.
Kid-friendly flavor: the filling is mild, cheesy, and familiar, which makes it an easy sell even for picky eaters.
Tested parboil timing: five minutes in boiling water is the exact window I found that softens the peppers without letting them collapse in the oven.
Gluten Free Stuffed Peppers with Ground Beef, Rice & Cheddar
These gluten free stuffed peppers are loaded with seasoned ground beef, tender basmati rice, and melted cheddar cheese, then baked until the peppers are tender and the tops are golden. A celiac-safe, freezer-friendly dinner ready in about an hour.
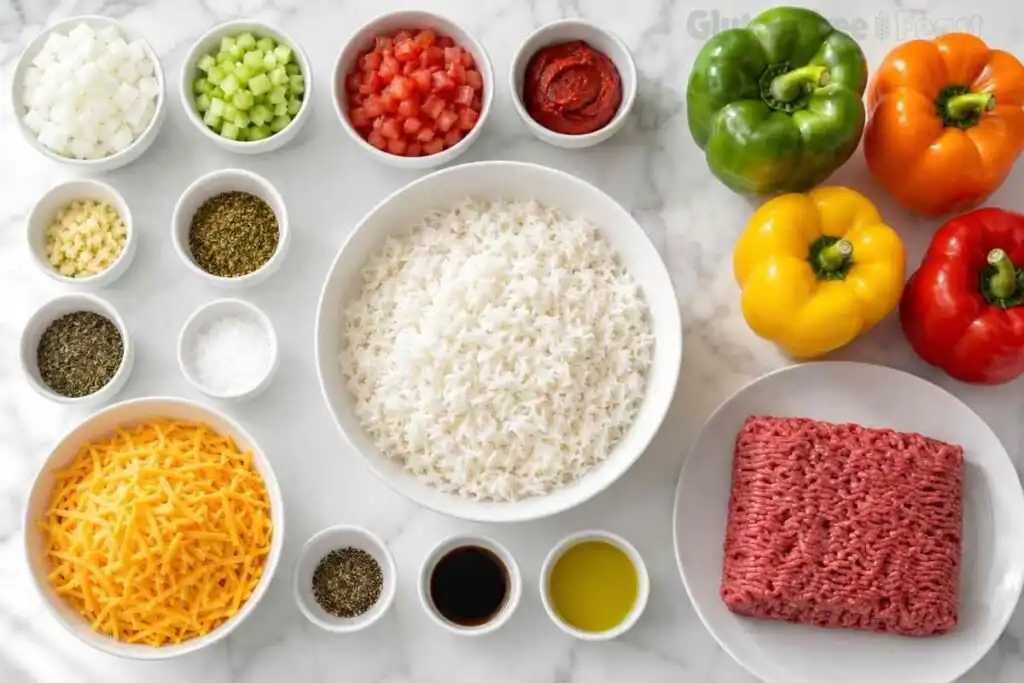
2cupcooked basmati ricefrom about 1 cup uncooked rice; naturally gluten free
For the Filling
1lblean ground beef450 g
2tbspolive oil
1/2cupdiced bell pepperfrom the reserved pepper tops
1/2cupdiced sweet onion
1/2cupdiced celery
1can diced tomatoes, undrained14.5 ounces / 410 g; use a plain diced tomato with no seasoning packet added
1/4cuptomato paste
2garlic cloves, minced
1tspdried oregano
1/2tspdried basil
2tspkosher salt, divided
1/2tspfreshly ground black pepper
2tbspgluten free Worcestershire saucecheck your bottle for a gluten free label; not all brands are third-party certified
1.5cupfreshly shredded mild cheddar cheese, dividedabout 6 oz / 170 g; shred from a block rather than using pre-shredded cheese
Equipment
Large pot
Large skillet
3-quart baking dish
Mixing bowl
Method
Prepare the Peppers
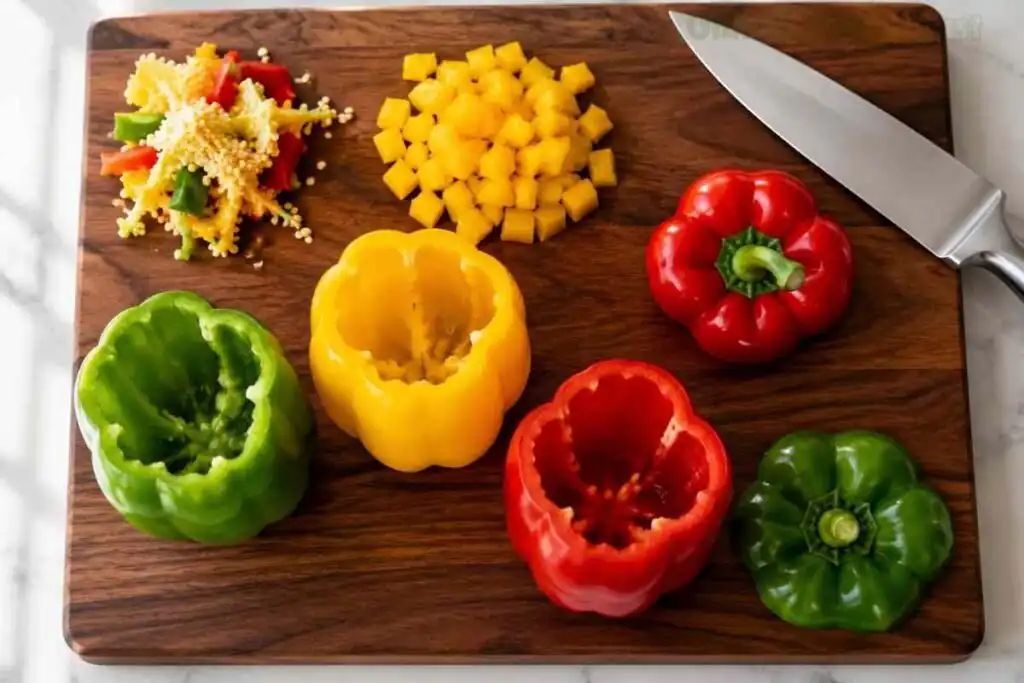
Preheat the oven to 350°F (175°C). Slice the tops off the bell peppers and dice the usable portions for the filling. Remove the seeds and membranes, keeping the peppers intact.
Parboil the Peppers
Bring a large pot of salted water to a boil. Add the peppers and simmer for 5 minutes until slightly softened. Drain well and set aside.
Cook the Filling
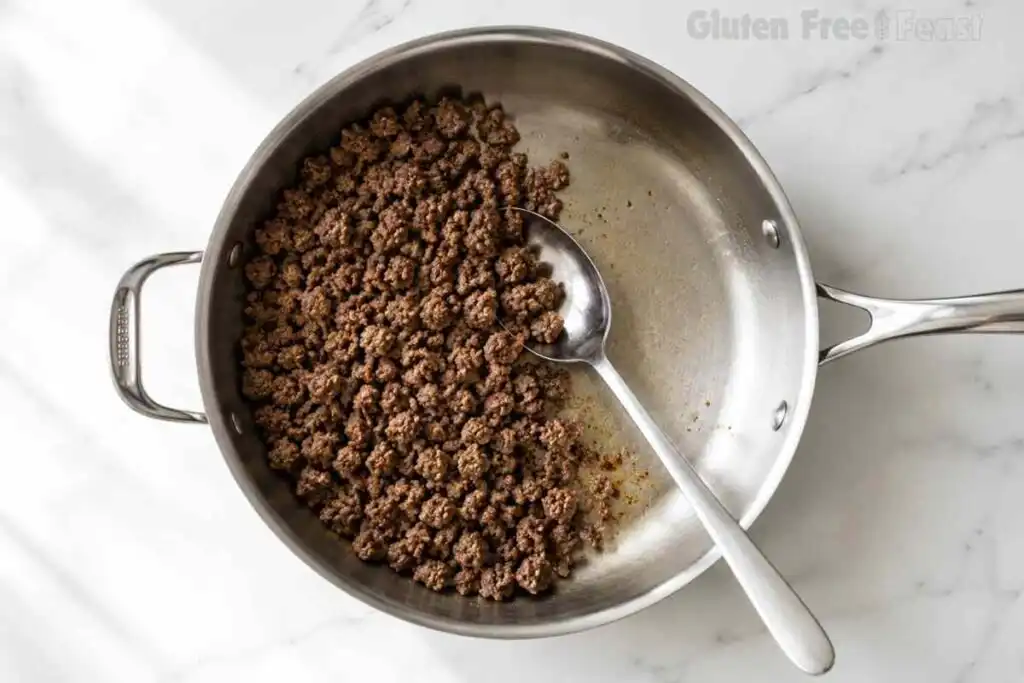
Heat the olive oil in a large skillet over medium-high heat. Add the ground beef and cook until browned, breaking it into crumbles.
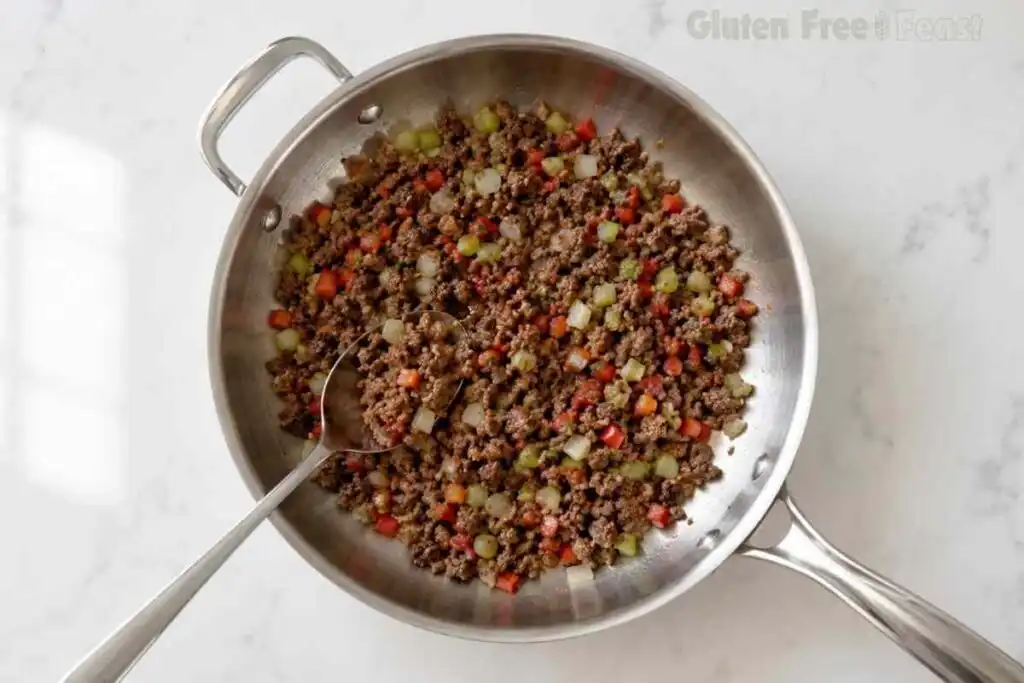
Stir in the diced bell pepper, onion, and celery. Cook for 5 to 6 minutes, until the vegetables begin to soften.
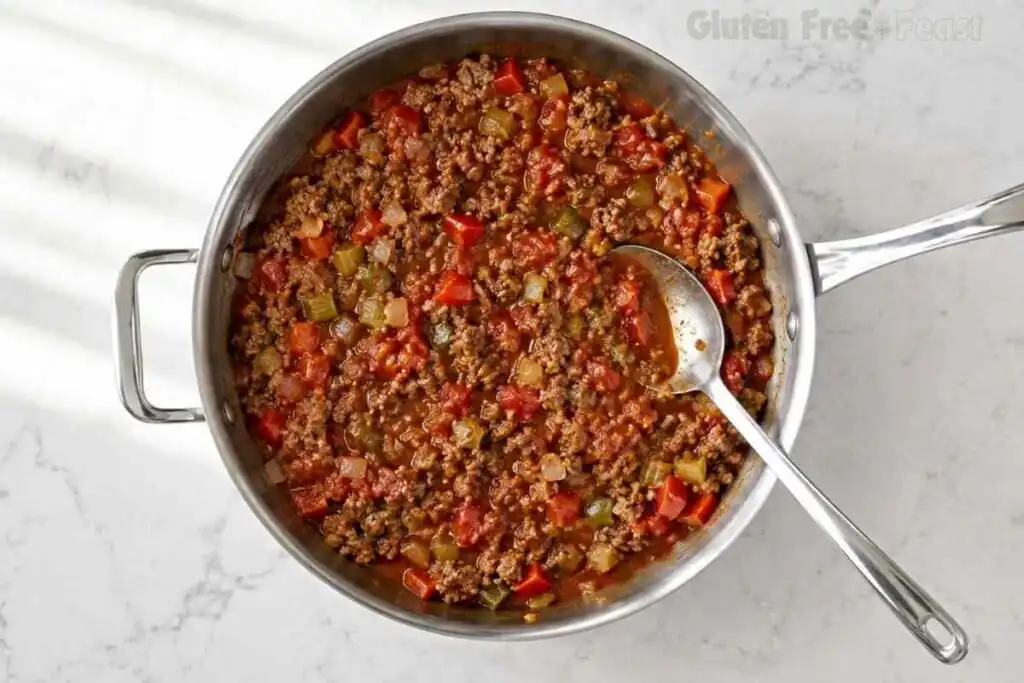
Add the diced tomatoes, tomato paste, garlic, oregano, basil, Worcestershire sauce, remaining salt, and black pepper. Simmer for 10 minutes, stirring occasionally.
Mix and Fill
Transfer the beef mixture to a large bowl. Add the cooked rice and 3/4 cup of the shredded cheddar. Mix until evenly combined.
Arrange the peppers upright in a 3-quart baking dish. Divide the filling evenly among the peppers, packing it in gently. Sprinkle the remaining 3/4 cup cheddar over the tops.
Bake
Bake for 30 minutes, until the peppers are tender and the cheese is melted, bubbly, and lightly golden. Cool for 5 minutes before serving.
Celiac Safety Note: Please ensure all packaged ingredients carry a certified gluten free label. For this recipe, check specifically: the canned diced tomatoes (no seasoning packet), the Worcestershire sauce, and any pre-shredded cheese if substituting for freshly shredded. Cross-contact at packaging facilities is a real risk for people with celiac disease. When in doubt, look for the certified GF symbol.Worcestershire sauce note: Widely available gluten free Worcestershire sauces are labeled gluten free by the manufacturer but are not always third-party GFCO or GIG certified. Check your specific bottle’s label and, if you have doubts about a brand, contact the manufacturer directly.Make-ahead: Assemble the peppers up to 24 hours in advance, cover, and refrigerate unbaked. Add 5 to 10 minutes to the bake time from chilled.Storage: Refrigerate in an airtight container up to 4 days. Freeze cooked peppers individually up to 3 months. Reheat at 350°F until heated through, or microwave individual portions.
Gluten-Free Note
This recipe is designed to be gluten-free when prepared with certified gluten-free ingredients. Always check labels, as ingredient formulations and manufacturing practices can change. If you have celiac disease or a severe gluten allergy, verify that all ingredients are certified gluten-free and appropriate for your dietary needs.
Bell peppers: Choose peppers that can stand upright on their own without tipping over. A flat bottom matters more than color, though red and yellow peppers tend to taste sweeter than green once roasted.
Basmati rice: Rice is naturally gluten free, but check the bag for a “may contain wheat” warning if it was processed in a shared facility. Cooked white or brown rice both work here if you prefer a different variety.
Canned diced tomatoes: Use a plain canned diced tomato with no seasoning packet added. Some flavored or “Italian-style” canned tomatoes include seasoning blends that can carry hidden gluten, so a plain can is the safer default.
Gluten free Worcestershire sauce: Standard Worcestershire sauce is typically thickened with barley malt vinegar, which makes it unsafe for celiac disease. Look specifically for a bottle labeled gluten free on the front. Double-check the ingredient list yourself rather than assuming based on the brand alone. Not every gluten free Worcestershire brand carries third-party GFCO or GIG certification, so read your specific bottle before buying.
Cheddar cheese: I recommend shredding a block of mild cheddar yourself rather than buying pre-shredded bags. Pre-shredded cheese is often coated with anti-caking agents like potato starch or cellulose. Most of these agents are gluten free, but the formulation can vary by brand and batch. Freshly shredded cheese also melts more smoothly, which gives you that stretchy, golden top.
Ground beef and technique: If you like working with seasoned ground beef, my gluten free meatballs recipe uses a similar approach to building flavor. It is a good next recipe to try if this one becomes a regular.
Celiac Safety Note: Please ensure all packaged ingredients carry a certified gluten free label. For this recipe, check specifically: the canned diced tomatoes for a seasoning packet, the Worcestershire sauce label, and any pre-shredded cheese substitution. Cross-contact at packaging facilities is a real risk for people with celiac disease. When in doubt, look for a certified GF symbol on the package.
How to Make Gluten Free Stuffed Peppers
Step 1: Prepare the Peppers
Preheat your oven to 350°F (175°C). Slice the tops off the bell peppers and set them aside. Dice the usable portions of the tops and reserve them for the filling. Remove the seeds and membranes from inside each pepper, keeping the pepper itself intact.
Step 2: Parboil the Peppers
Bring a large pot of salted water to a boil. Add the peppers and simmer for 5 minutes, until they are just slightly softened. Drain the peppers well and set them aside.
Parboiling matters more than it seems: a brief boil softens the pepper’s cell walls just enough that it finishes tender in the shorter second bake. This keeps the pepper from staying crunchy or turning mushy the way a single longer bake would.
Step 3: Cook the Filling
Heat the olive oil in a large skillet over medium-high heat. Add the ground beef and cook until browned, breaking it into small crumbles as it cooks. Stir in the diced bell pepper, onion, and celery, then cook for 5 to 6 minutes until the vegetables begin to soften.
Add the diced tomatoes, tomato paste, garlic, oregano, basil, Worcestershire sauce, remaining salt, and black pepper. I use the tomatoes undrained on purpose: the reserved liquid keeps the filling moist through the second bake without needing any added broth. Simmer everything for 10 minutes, stirring occasionally so the bottom does not catch.
Step 4: Mix the Filling
Transfer the beef mixture to a large bowl. Add the cooked rice and ¾ cup of the shredded cheddar, then mix until everything is evenly combined. The filling should look loose and slightly wet at this stage, which is correct.
Step 5: Fill the Peppers
Arrange the peppers upright in a 3-quart baking dish. Divide the filling evenly among the peppers, packing it in gently with the back of a spoon. Sprinkle the remaining ¾ cup of cheddar over the tops.
Step 6: Bake
Bake for 30 minutes, until the peppers are tender and the cheese on top is melted, bubbly, and lightly golden. Let the peppers cool for 5 minutes before serving, since the filling holds a lot of heat right out of the oven.
Expert Tips for Best Results
Do not skip the parboil step. Peppers that go into the oven raw take much longer to soften, and by the time they do, the cheese on top is usually overcooked.
Watch the parboil time closely. Five minutes is the number I landed on after testing shorter and longer times; any longer and the peppers can go floppy before they even hit the oven.
Shred your own cheese. Freshly shredded cheddar melts into a smoother, more even layer than pre-shredded cheese, which tends to clump.
Choose peppers with flat bottoms. A wobbly pepper spills its filling in the oven, so test each one on the counter before you buy.
Season the filling before it goes in the pepper. Taste the beef mixture at the end of the simmer step. It is much easier to adjust salt and pepper here than after the peppers are stuffed and baked.
Let the peppers rest before cutting. Five minutes of rest allows the filling to firm up slightly, so it holds together better when you serve it.
Substitutions and Variations
Leaner protein: Ground turkey or ground chicken both work well in place of beef for a lighter version. The cook time in the skillet stays about the same.
Rice alternatives: Swap the basmati rice for cooked brown rice or quinoa if you prefer a different grain. Both are naturally gluten free, so no certification concerns there.
Extra vegetables: Mushrooms, spinach, or zucchini can be added to the filling along with the onion and celery for more volume and nutrients.
Cheese swap: Monterey Jack, mozzarella, or pepper jack can replace the cheddar if you want a different flavor or a bit of heat.
What to Serve With Gluten Free Stuffed Peppers
These peppers are hearty enough to stand on their own, but a few sides round out the meal nicely. Here is what I reach for most often.
A simple green salad: A light, vinegar-based salad balances the richness of the cheese and beef without adding any gluten risk.
Warm biscuits: My gluten free biscuits are a favorite pairing here, especially for soaking up any extra filling that spills onto the plate.
A cold pasta salad: For warmer months, a chilled gluten free pasta salad makes a refreshing contrast to the warm, cheesy peppers.
A cup of soup: On cooler nights, a small bowl of gluten free chicken noodle soup alongside one stuffed pepper makes a comforting, complete dinner.
Storage and Make-Ahead Instructions
Refrigerator: Store baked peppers in an airtight container for up to 4 days. They reheat well and often taste even better the next day.
Freezer: Freeze cooked stuffed peppers individually, wrapped or in a sealed container, for up to 3 months. Individual freezing makes it easy to pull out just one or two servings at a time.
Reheating: Reheat in a 350°F oven until heated through, or microwave individual portions for a faster option. Frozen peppers can go straight into the oven; just add extra time to account for the starting temperature.
Make-ahead: Assemble the peppers up to 24 hours in advance and refrigerate them unbaked, covered tightly. Add 5 to 10 minutes to the bake time when starting from cold. If you like planning hearty, ground-beef dinners this way, my gluten free chili follows a similar make-ahead approach.
Why Trust This Recipe
With a background in laboratory science, I develop recipes the same way I approached lab work: documented testing, controlled variables, results that hold up. Every recipe should be replicable in any home kitchen, not just mine.
This recipe has been tested multiple rounds in my dedicated gluten free kitchen. I have noted what fails, what works, and why, so you are not just following steps but understanding the process.
What that means for you:
Multiple test batches before publishing
Science-based notes on key steps throughout
Honest substitution guidance, not guesswork
Safe for celiac disease, with cross-contact taken seriously at every step
Frequently Asked Questions
Can celiacs eat bell peppers?
Yes, bell peppers are naturally gluten free. The only risk in a stuffed pepper recipe comes from add-in ingredients like canned tomatoes, Worcestershire sauce, or seasoning blends, not from the pepper itself.
What do you fill stuffed peppers with?
Classic fillings combine a cooked grain, a ground protein, aromatics like onion and garlic, and cheese. This recipe uses rice, ground beef, and cheddar. All of these ingredients are naturally gluten free, as long as any packaged item is checked for a gluten free label.
Do you use breadcrumbs in stuffed peppers?
Some stuffed pepper recipes top the filling with breadcrumbs for extra crunch. This recipe skips breadcrumbs entirely, so there is no need to source a certified gluten free breadcrumb brand for this particular version.
Should peppers be cooked before stuffing?
Yes, a brief parboil softens the pepper walls so they finish tender in the oven rather than staying crunchy. Skipping this step usually means the pepper is still firm by the time the filling and cheese are fully cooked.
How far in advance can you make stuffed peppers?
You can assemble the peppers up to 24 hours ahead and refrigerate them unbaked. Add 5 to 10 minutes to the bake time when cooking straight from the refrigerator. For a longer-term option, freeze cooked peppers individually for up to 3 months.
Why is my stuffed pepper filling watery?
A watery filling is usually caused by using drained tomatoes plus too much added liquid, or by not simmering the filling long enough before assembling. Simmering the beef mixture for the full 10 minutes, as written, allows excess liquid to reduce before it goes into the pepper.
Final Thoughts
These gluten free stuffed peppers have earned a permanent spot in my regular dinner rotation, and I think they will earn one in yours too. The method is simple and the ingredients are easy to find. The payoff is a meal that looks far more impressive than the effort it actually takes. Give them a try this week, and consider doubling the batch so a few end up in the freezer for a busy night.
The recipes on this site come from a scientist who went gluten-free and refused to settle for dense, gummy results. BSc in Molecular Biology & Genetics. Former laboratory analyst. Full-time founder of Gluten Free Feast.
Every recipe is mine, developed, tested and written by me.
My Commitment: Every recipe on Gluten Free Feast is created with gluten-free ingredients and thoroughly tested. Because brands and manufacturing practices can change, always verify that your ingredients are certified gluten-free if you have celiac disease.
Molecular Biologist · Laboratory Analyst · GF Recipe Developer 🎓 BSc Molecular Biology & Genetics — Boğaziçi University, Istanbul, Turkey Former Biological Laboratory Analyst Founder & Recipe Developer — Gluten Free Feast Claire's scientific background means every recipe on this site is built on a genuine understanding of food science — from why gluten-free flours absorb moisture differently, to how specific binding agents replicate gluten's structural role in baking. Read Claire's full story →